Author - Mr. Catmandu

Six Tips for Getting Your Cat’s Scratching Under Control

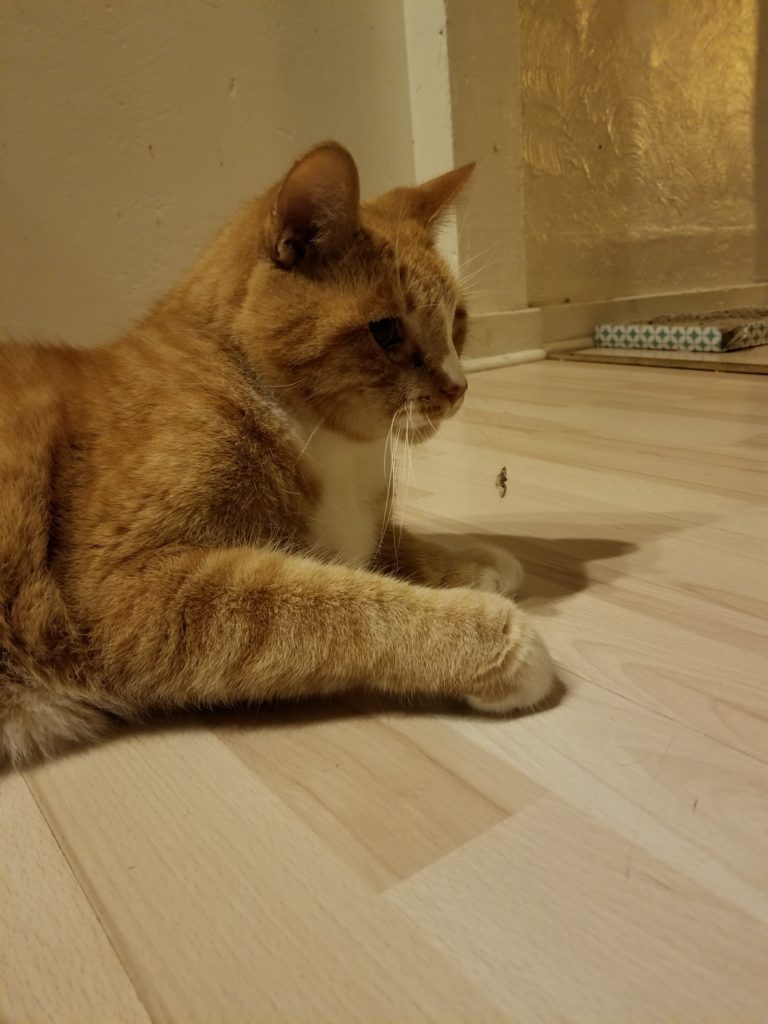
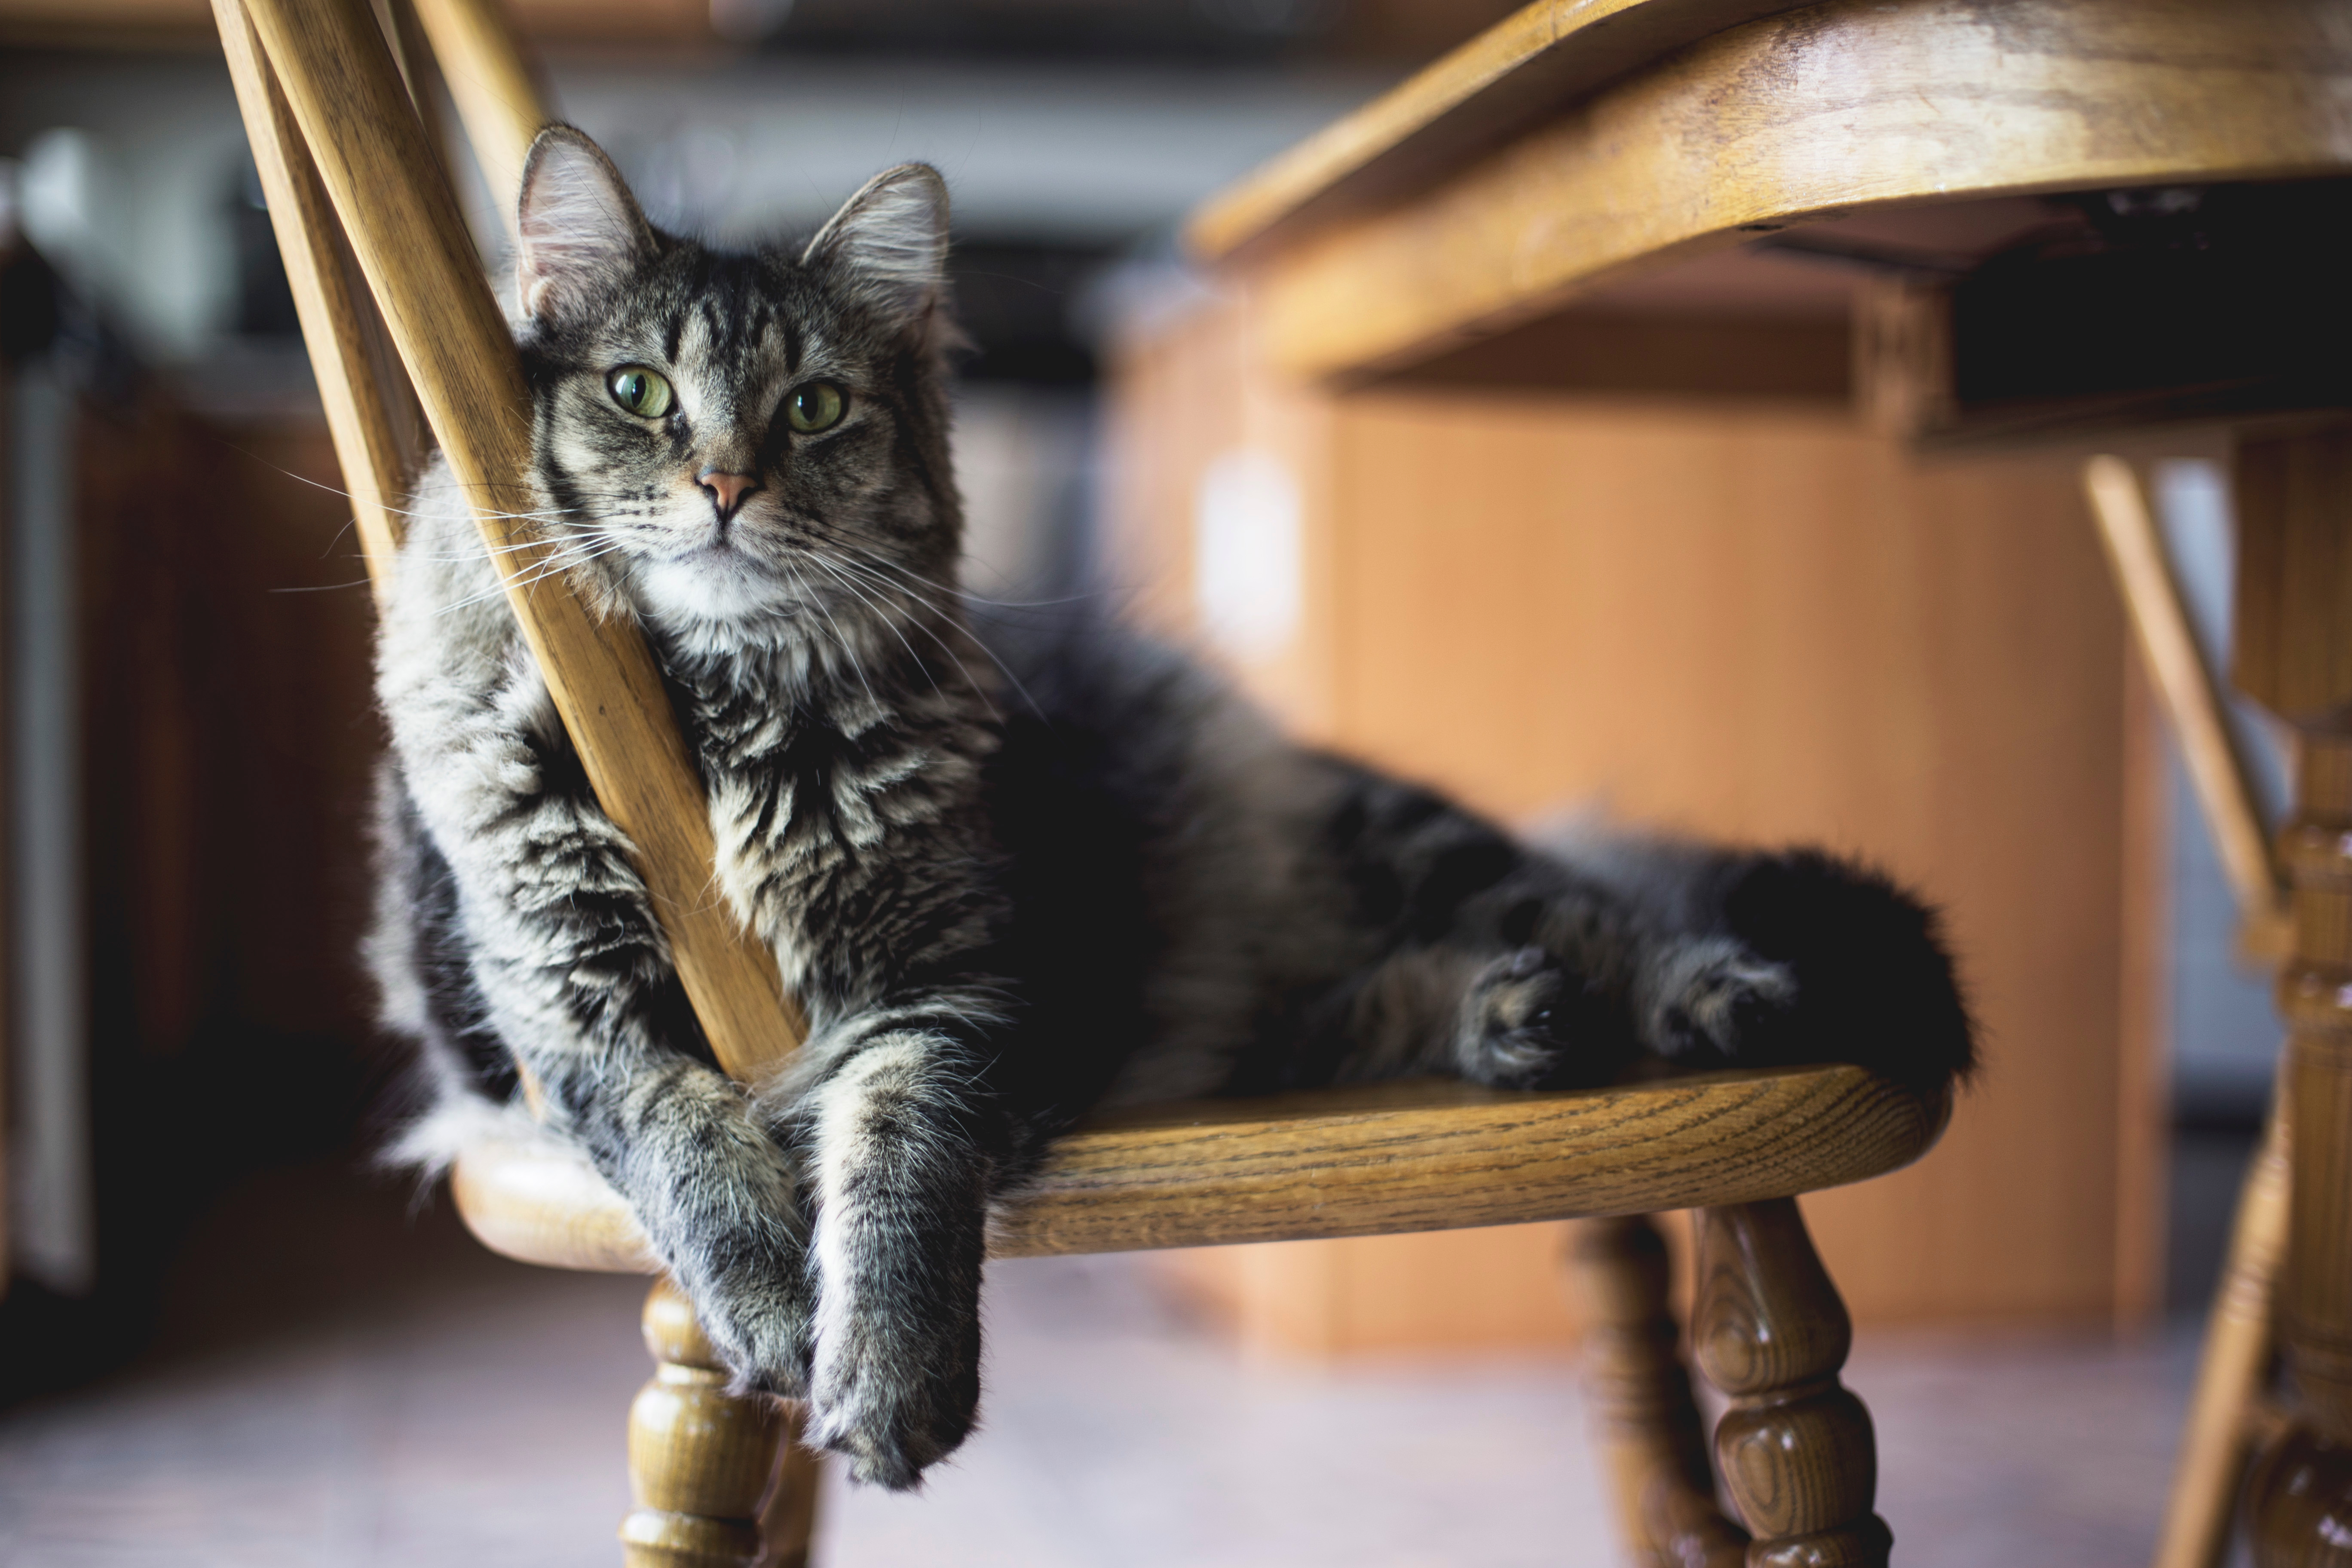
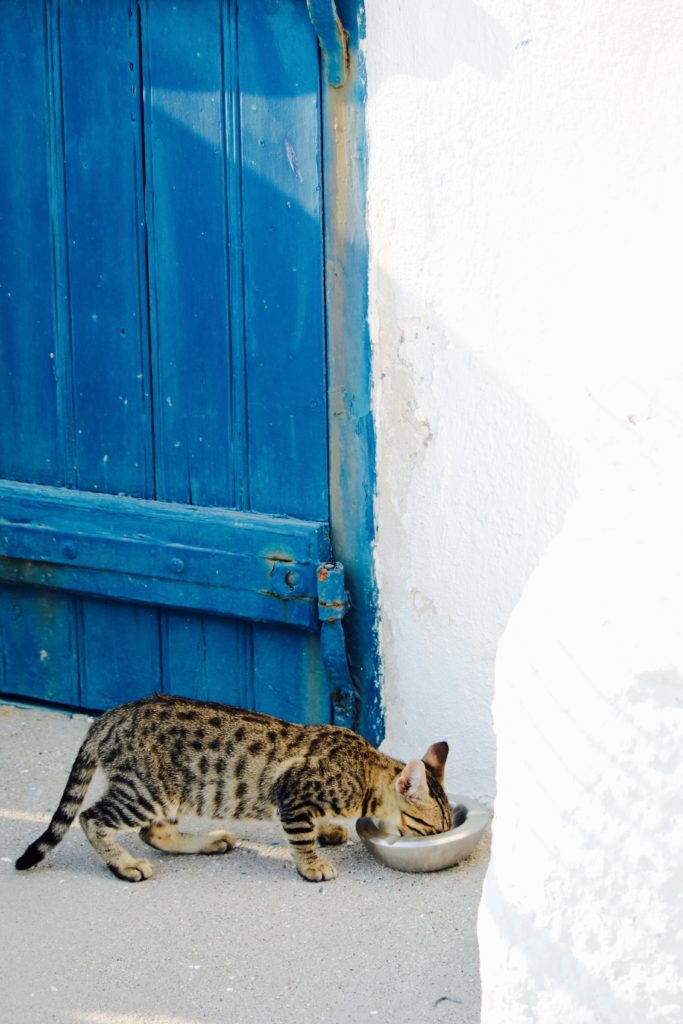
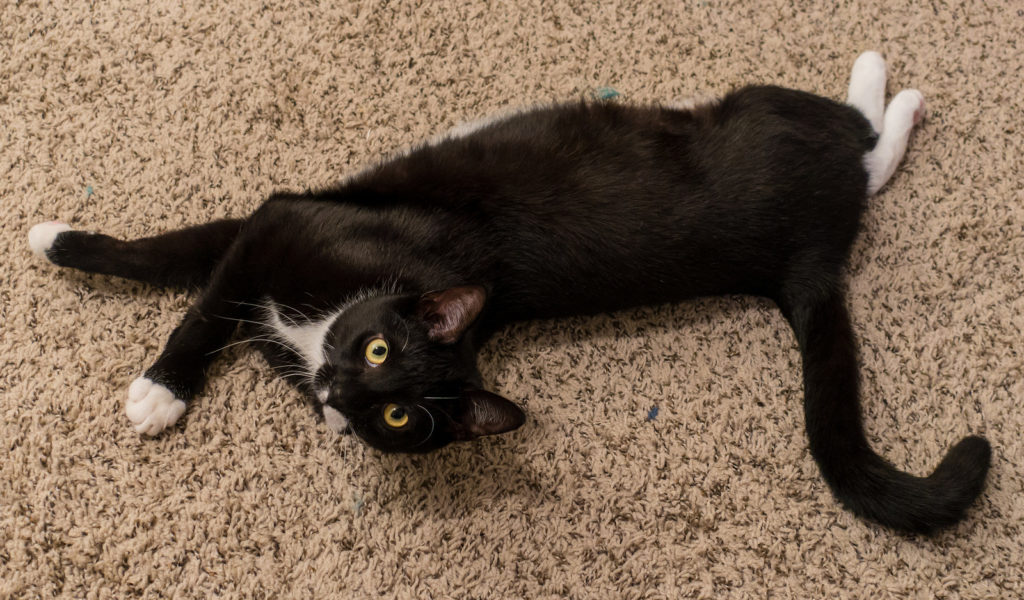
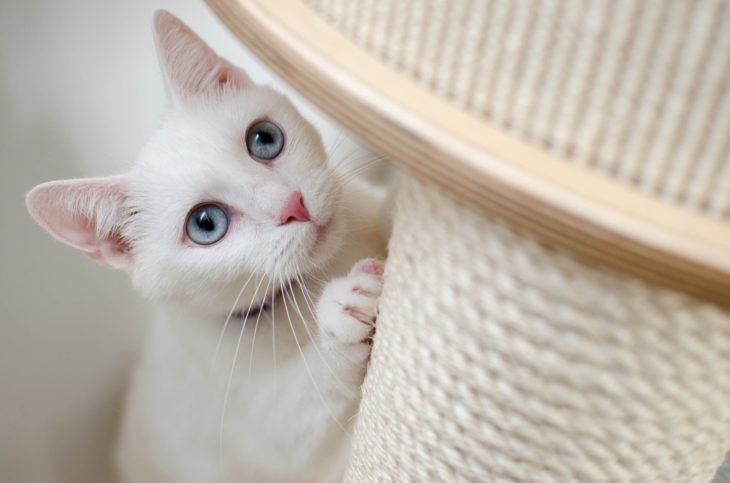
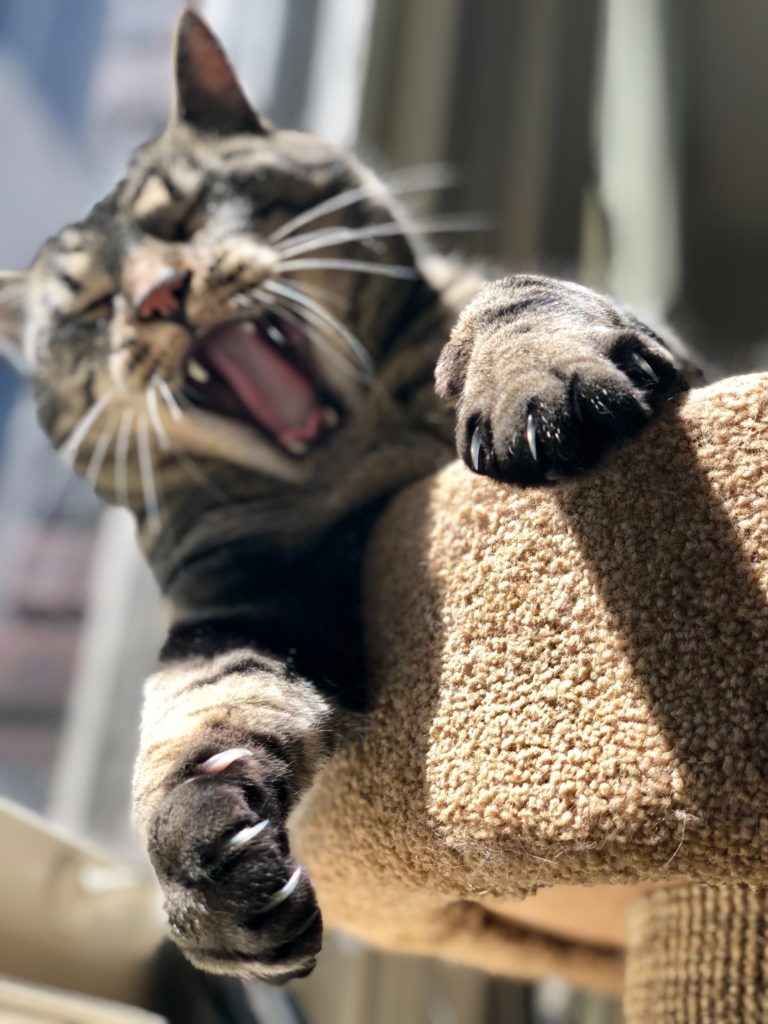
Every cat owner has experienced the fear of hearing their cat suddenly start scratching at an unknown object. Upon hearing this sound, we typically jump up and try to figure out what’s being scratched, and to chase our cat away to try and discourage the behavior. Usually, it’s a piece of furniture or a patch of carpeting. 

Once a cat starts scratching an object regularly, it’s very hard to get them to stop. Cats are creatures of habit, and they tend to stick to established routines. It’s important to try and stop unwanted scratching behaviors early so they don’t become habits. 

But why does your cat feel the need to scratch in the first place? Understanding why cats scratch can make it much easier to control the behavior.

Why Do Cats Scratch?

1. Instinct

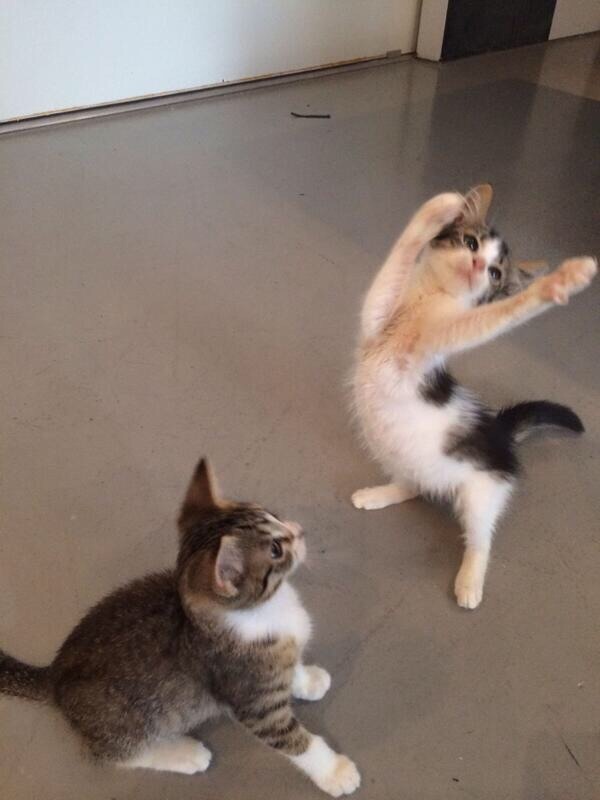
The scratching behavior is an innate instinct that emerges very early in kittenhood and continues throughout a cat’s life. Scratching is common among both indoor and outdoor cats as well as among both domestic and wild cats. Scratching behaviors are plentiful during kittenhood, as scratching plays a significant role in play. As cats age, the amount of scratching they do will decrease a bit, but you can expect a cat to keep scratching for its entire life. 

2. Claw Maintenance 

Cats scratch to remove the dead outer layer from the exterior of their claws, keeping them sharpened and ready for hunting. The claws on a cat’s front paws tend to be sharper than the claws on its hind paws. As a result, cats tend to scratch more frequently with their front paws than with their hind paws. To sharpen their hind paws, cats usually chew at them with their mouths. 

3. Territorial Marking

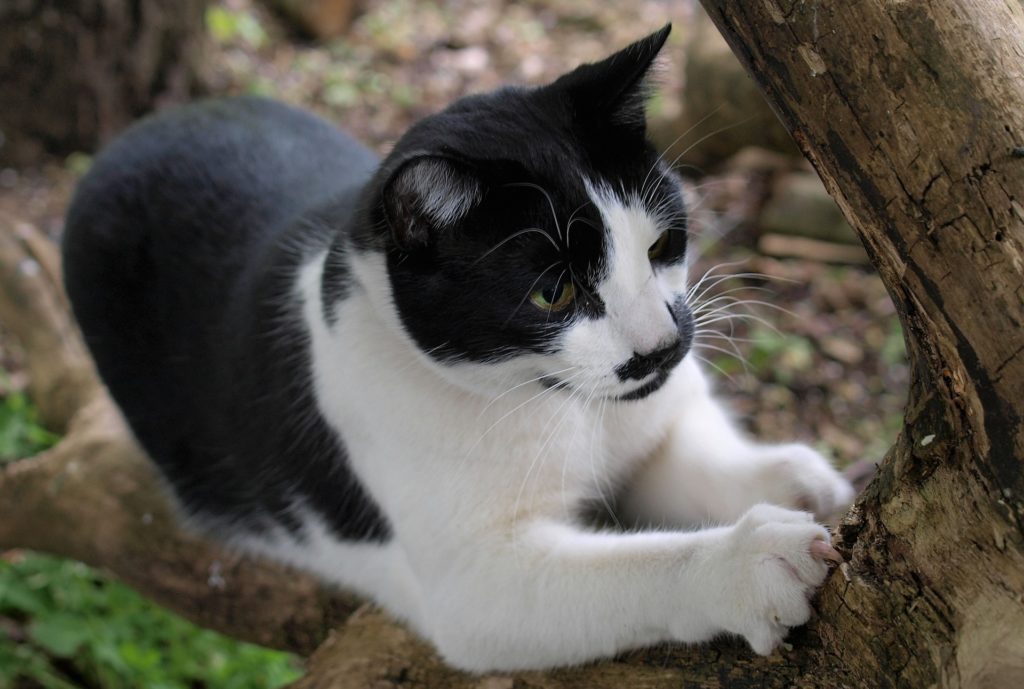
Cats scratch to mark their territory and to leave a trace of their scent. In the wild, cats typically scratch logs or trees as a means of marking the boundaries of their territory. Cat paws contain scent glands that deposit a trace of a cat’s scent whenever they scratch, serving as a scent-based method for marking territorial boundaries.

Black and white cat scratching a log.
4. Exercise

Cats scratch as a means of stretching their legs and paws. The scratching motion allows a cat to stretch out its entire body, including its legs and back. Often cats will begin scratching as a precursor to additional hunter-like behaviors, including intense play. It serves as a form of warm-up exercise, getting the cat’s muscles (and claws) ready to spring into action. 

5. Fighting

Scratching is a cat’s primary move for both attack and defense. Cats scratch while fighting, but they also scratch while playing or simply when they want to be left alone. If your cat takes a swipe at you, it’s important to consider the context. Cats may swipe at your ankles when they are feeling playful, but they may also swipe at your hand if you try to rub their belly or another part of their body they want you to stay away from. 

Scratching and biting during play cannot be fully eliminated since they are the primary elements of a cat play session. Cats play by simulating hunting behaviors, so biting and scratching are going to be a part of playtime no matter what. It’s important to transfer scratching and biting onto toys and cat furniture and to encourage your cat to use them by providing reinforcement, including catnip, attention, and treats. Don’t encourage your cat to bite and scratch at your hand while they are a kitten. It may seem cute since most kittens are not able to bite or scratch hard enough to break the skin, but this behavior will be carried over into adulthood, where they can cause injury to their owner during what they believe is a harmless play session.

When Scratching Becomes a Problem

Orange and white cat with claws exposed.

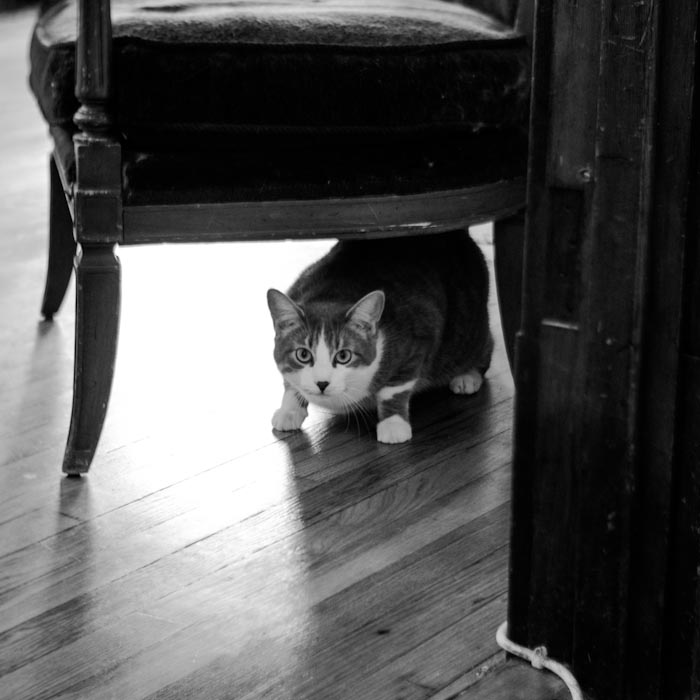
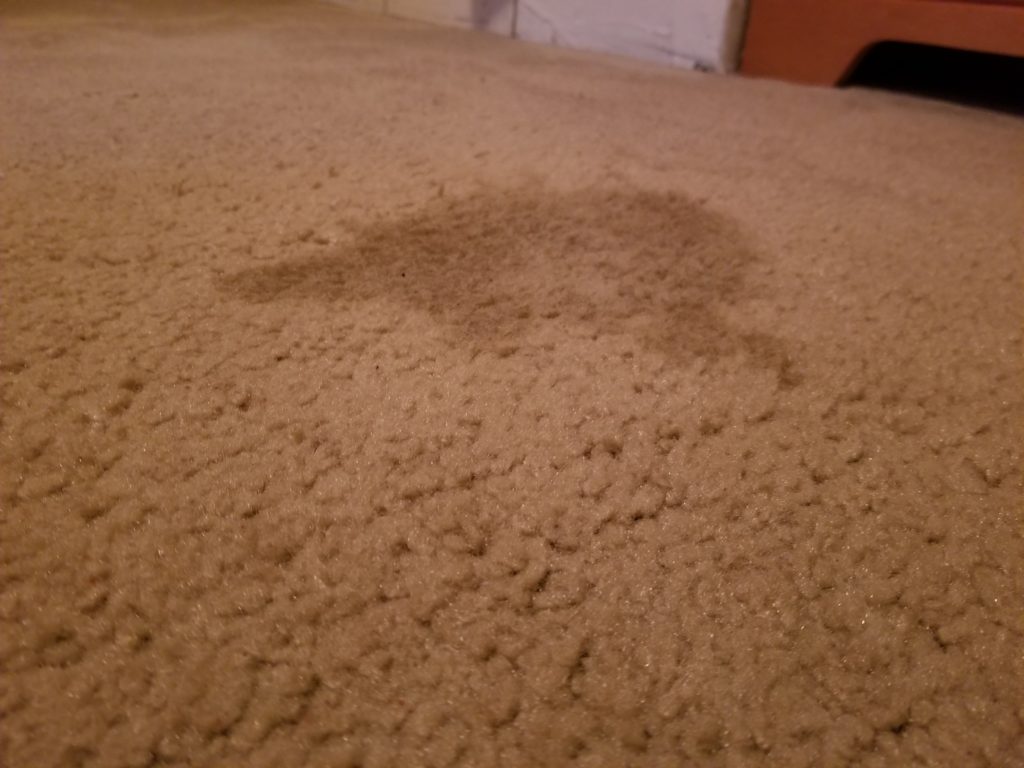
Scratching can become a problem when it begins to damage furniture, carpet, or other pieces of the household. Cats tend to scratch the corners of furniture. Cats may also scratch carpets, including area rugs. Often, cats will scratch the corners of carpeted stairs. Cats may also scratch wooden corners, especially door jambs or other areas that are already prone to wear and roughness. 

Scratching can also become a problem when your cat is aggressively attacking you or other humans who are not engaged in any threatening behaviors. This type of activity can indicate that the cat is in pain or has a serious medical condition. Cats that demonstrate particularly aggressive scratching behavior should be evaluated by a veterinarian, who may refer the cat to a cat behaviorist. 

It’s very important to remember that cats scratch out of instinct. Scratching is a behavior that cats feel compelled to do without necessarily understanding the mechanisms behind why they feel so inclined. We also can’t blame cats for failing to immediately understand the difference between a scratching post and a sofa. To a cat, it all just looks like some good stuff to scratch.

It’s also important to remember that scratching is a healthy behavior for cats, and you should NEVER try to fully stop your cat from scratching. Your cat’s instinct will override your authority every time. Instead, it’s up to you to give your cat plenty of appropriate scratching options to make sure they limit their scratching to locations and situations where it is acceptable. 

Getting Your Cat’s Scratching Under Control

Cat on a scratching post

If left unmanaged, problem scratching behaviors can cause a significant amount of damage to your belongings. Correct scratching behaviors early, during kittenhood and as new behaviors emerge through adulthood. Here are some tips for getting scratching behaviors under control right away.

1. Provide Lots of Good Scratching Options

Giving cats plenty of options for scratching is essential. Different cats have different scratching preferences, and a cat’s preference may depend on its current mood or location. Sometimes cats prefer to scratch while standing horizontally on all fours, putting their weight onto their back haunches and scratching downward. Cats typically engage in this type of scratching when they are scratching carpet or flooring. Other times, cats like to scratch while standing vertically on their hind legs, scratching with a downward motion against a vertical surface. Cats that scratch in this position typically scratch door jambs or corners of wooden furniture. 

Your cat may have a preference for one type of scratching over the other, but they will probably engage in both types sooner or later. Whatever the case may be, it’s important to pay attention to where your cat tends to engage in scratching and what types of materials they tend to be drawn to. Give them both a horizontal and a vertical scratching option so they will be able to scratch in any direction should they feel compelled. 

Choosing the Right Material

Cats tend to prefer scratching at materials which are tough and durable but which can be damaged by their claws. They prefer the feeling of tearing over the feeling of scratching against an un-damageable surface such as rough metal or stone. As a result, materials such as cardboard and fibrous materials make good materials for scratching posts. 

When choosing materials for cat scratching furniture, try to select materials that are different than the materials you are trying to get your cat to stop scratching. If, for example, your cat is scratching at your carpet, you should avoid purchasing cat furniture that is upholstered in carpeting. Instead, you should try a cardboard or fiber material that has a much different feel than the carpet you are trying to protect. 

An important consideration that may be overlooked is the sound a scratching post or pad makes whenever your cat is scratching it. Cats typically like to make a lot of noise when scratching. While it may be preferable from you (the owner)’s perspective to have a quieter scratching material, your cat will disagree. Providing a scratching post or pad that makes a satisfying noise whenever your cat scratches it will encourage your cat to scratch it more frequently, protecting your furniture.

Cardboard Scratching Pads

Cardboard scratching pads work great for controlling scratching behaviors. They are relatively inexpensive, and they typically last a while before needing to be replaced.

Cardboard is especially attractive to cats since it is very shredable. They will be able to tear it apart and see the results of their scratching almost immediately.

Sisal Fabric Posts and Pads

Sisal fabric is used extensively in the production of cat furniture and scratching posts, and for good reason. This type of fabric is made of agave plant fibers. It resembles other types of fiber such as jute, but it is stronger. Sisal is often used to make rope, twine, and carpeting.

7 Ruby Road Cat Scratching Post for Floor or Wall Mounted Use

2. Play With Your Cat More

The logic is simple: your cat will scratch more if they are bored. Cats that don’t receive much attention may engage in scratching behaviors as a means of getting attention as well as expending excess energy. Making sure your cat has plenty of active playtime every day will help ensure that they don’t have too much extra energy to apply towards aggressive scratching behaviors. 

When playing with your cat, make sure to incorporate scratching posts and pads. A cat may suddenly get the urge to scratch in the middle of a play session, so it’s important that they have an option available should the need arise. 

3. Try Cat Training Tape

Cat training tape may be an option if your cat has already established a scratching habit on a piece of furniture or other item that you would like to try and save. Sometimes, a cat establishes a routine scratching behavior without our knowledge. This may happen if a piece of furniture is out of earshot or in a part of the household that does not receive much foot traffic. 

Once the scratching behavior has been established, cat training tape may be used to try and discourage future scratching. Cat training tape is simply a type of double-sided tape that can safely be applied to furniture without leaving a film or residue. The sticky feel of the tape is unpleasant to cats, and putting cat training tape on areas where your cat has already established a scratching behavior can help break the habit by discouraging scratching.

Cat training tape is available in a variety of shapes, but it is typically transparent to try and be as unobtrusive as possible. Many shapes of tape are available so they can be cut to custom sizes to fit your furniture. 

4. Bribe Your Cat With Catnip

If your cat isn’t showing much interest in the cat scratching posts and pads you’ve purchased for them, try sparking their interest with some catnip. Scratching behavior can be encouraged by sprinkling catnip on scratching posts and pads. Catnip works particularly well when sprinkled onto cardboard scratching pads. These pads contain crevices that work well for storing catnip where it can’t be immediately accessed by your cat. They will need to shred through the cardboard to reach the catnip, encouraging scratching.

The euphoric effect produced in your cat by catnip may cause them to exhibit scratching behavior. If you’re going to give your cat catnip, make sure to give them plenty of scratching options in addition to the catnip. That way they’ll have something to scratch if they get the urge.

5. Trim Your Cat’s Nails Regularly

Clipping your cat’s nails from time to time can help reduce the amount of scratching your cat feels compelled to do. For most cats, clipping the claws about once every month is sufficient, but you should consider clipping if you notice your cat’s claws getting stuck in things accidentally whenever they scratch or if you hear them clicking whenever your cat walks across hard flooring. 

To trim a cat’s nail, gently hold one paw between your fingers and press down on the top of the paw. This will push the cat’s claw out if it’s sheath. Within the cat’s claw is a pink nerve ending called the quick. Trim the claw up to a point just before the quick, and avoid cutting the quick directly. Cutting the quick is painful to your cat and can cause bleeding. To avoid cutting the quick by accident, clip conservatively, opting for less claw at a safer distance from the quick. Simply removing the sharp claw point will be helpful. 

If you avoid the quick, the trimming process will be painless for your cat, although they will be fidgety. Most cats do not like to have their paws manipulated, so you may need to break up the trimming process into several sittings. 

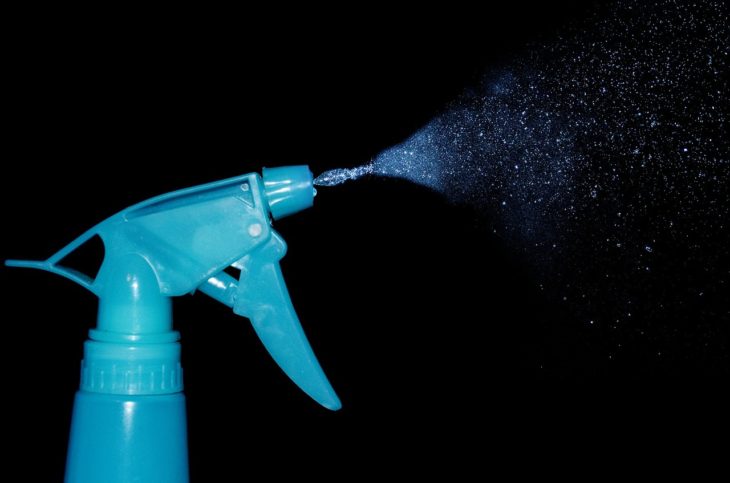
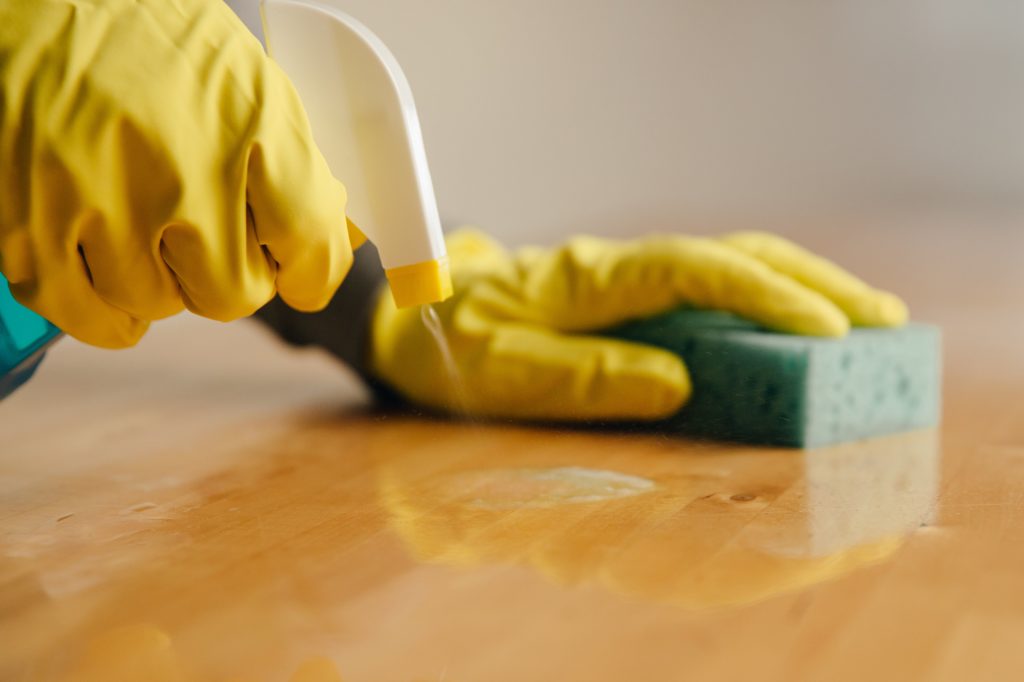
6. Consider a Pet Deterrent Spray

If the other options on this list aren’t working, consider investing in a pet deterrent spray. A wide variety of deterrent sprays are available. In order for a deterrent spray to be effective, it needs to be applied regularly to ensure that its strength is maintained. It also needs to be odorless to humans, and it should not leave a film or residue after it evaporates.

Using a motion-activated pet deterrent spray is a great way to make sure that the spray is applied regularly. In fact, motion-activated pet deterrent sprays were also one of our recommendations for keeping your cats off of the kitchen counter. These types of spray also provide the added benefit of associating a noise with the application of the deterrent spray. Your cat will become startled by this noise and will begin avoiding the area around the motion-activated spray deterrent all together. 

Spray deterrents may be necessary for protection of particularly vulnerable pieces of furniture or breaking heavily established scratching behaviors.   

DON’T DECLAW!

No matter how irritating your cat’s scratching behaviors may be, please do not consider declawing your cat. Declawing is painful and can cause a host of other medical conditions. If your cat’s scratching behaviors seem like they cannot be corrected, see a veterinarian or cat behaviorist. Declawing should never be the answer to problems with cat scratching behaviors. You can read more about why declawing your cat is a bad idea in this post from the Humane Society of the United States

Purina Tidy Cats Breeze Litter Box System Review

Purina Tidy Cats Breeze Litter Box System with a cat next to it

Cat litter boxes come in all sorts of flavors. Here at Mr. Catmandu, we’ve looked at automatic, self-cleaning litter boxes (see:  CatGenie, PetSafe ScoopFree), top-entry litter boxes (see:  ModKat, IRIS), and uniquely designed sifting litter boxes (see:  KittyTwister). But if you think that covers the entire spectrum of litter box types that are available, you would be wrong. We’re just starting to scratch the surface.

Most litter boxes use clumping, bentonite-clay based litter. Non-clumping clay litter used to be the norm, but it fell out of favor several years ago when clumping litter took over as the standard. Since that time, most cat owners have grown accustomed to scooping out large clumps of cat poop and pee whenever they’re doing litter box maintenance. This certainly beats the full litter removal that was required during the pre-clumping era, but it’s still a pain.

One of the biggest frustrations of clumping litter is the volume of litter that gets consumed by cat urine. A little bit of litter sticks to your cat’s solid wastes, but urine ends up creating big clumps of litter that must be removed and, ultimately, replaced. You end up throwing away a pretty significant quantity of litter with every scoop.

Wouldn’t it be great if there was a litter box with litter that didn’t get totally consumed by the moisture in your cat’s poop and pee, and that also controls odor? Well, you’re in luck, because there is! Say hello to the Purina Tidy Cats Breeze Litter Box System!

Purina Tidy Cats Breeze Litter Box System

Specifications
  • Materials:  Plastic
  • Dimensions:  20.5 in. L x 15.8 in. W x 10.1 in. H
  • Weight: 9.2 lbs
Description

The Purina Tidy Cats Breeze Litter Box System is brought to us by Purina Tidy Cats, a cat products behemoth. The Tidy Cat brand can originally be traced back to Ed Lowe, a man who single-handedly changed the pet product world when he “invented” cat litter in the late 1940’s.

Before Ed, most people either let their cat go to the bathroom outside or used ashes, dirt, sand or other generic materials as a rudimentary form of cat litter. Ed began using clay minerals to create a bed for his cat to go to the bathroom on, mostly because of the material’s high absorptive capacity. The rest is history. Ed named his product “Tidy Cat” cat box filler in 1968. After Ed died, the Purina corporation bought up the Tidy Cat brand, which is where it resides today.

We’ve looked at variety of types of litter boxes, but this is the first litter box “system” we’ve evaluated. The Purina Tidy Cats Breeze Litter Box System is made up of the following components:

  • Sidewall
  • Grated Tray
  • Base with Sliding Drawer for Cat Pad

Purina Tidy Cats Breeze Litter Box System

How it Works

The Purina Tidy Cats Breeze Litter Box System resembles a typical, clumping cat litter box. However, unlike a normal litter box, the Breeze System utilizes special, proprietary dehydrating pellets in lieu of traditional clumping litter.

The special dehydrating pellets are placed into a Grated Tray that sits above the litter box Base. The litter pellets dehydrate solid waste, preparing it for removal via scooping. However, the litter is not designed to clump together when exposed to cat urine. Instead, urine is allowed to filter through the litter and out of the Grated Tray into the litter box Base. Some of the moisture from the urine is absorbed by the pellets as it passes through, but not very much. Once the urine enters the Base, it is absorbed by a replaceable absorbent pad.

Replaceable absorbent pads are installed using a plastic tray that slides underneath the litter chamber. For a single-cat household, the pads are able to provide moisture and odor absorption for up to seven days. Once the pads are no longer absorbing odor or moisture, they can be removed and replaced. You may need to replace the pads more frequently if you have multiple cats using the Breeze System litter box.

Here’s a video showing how the Breeze System litter box works:


Assessment
Design

The Breeze System has a fairly high sidewall that curves inwards at the top. This wall helps prevent litter from being kicked out by your cat while she is using the litter box.

The shape of the Breeze System litter box is sleek and attractive. It is only available in one color option (green). This is great news if green is your favorite color, but if it’s not, you’re just going to have to deal with it.

Two types of Breeze System litter box are available: hooded and open. Since we don’t like hooded litter boxes at all, we highly recommend going with the open system in lieu of the hooded option. This will allow your cat to feel a bit more comfortable while he’s doing his business.

The biggest downside of the Breeze System litter box is its size. Many users have pointed out that the litter box is too small for larger adult cats. If you have a large cat, you may want to consider going with a larger litter box. Hopefully Tidy Cats will develop a large version of this litter box in the future.

Ease of Use

The litter pellets are 99.9% dust free, and they are fairly large, preventing them from sticking to your cat’s paws and tracking all around your house. The pellets are able to withstand up to a month of continuous usage in a single-cat household, meaning that you’ll replace the litter far less frequently than a normal litter box.

The biggest benefit of the Breeze System is that your litter is not consumed by absorbing urine and forming large urine clumps. While bentonite clay litters effectively clump urine into solid masses that can be scooped and removed, the Breeze System allows the litter to remove moisture only from solid waste. As a result, the litter lasts much longer in the Breeze System than in a traditional litter box.

Replacing the absorbent pads is easy. You simply pull out the drawer on the litter box Base, pull the pad out, discard, replace, and push the tray back into the Base. 

Purina Tidy Cats Breeze Litter Box System back of box with instructions

Quality and Durability

The Breeze System is made out of durable plastic. It’s the same type of plastic that most other litter boxes are constructed out of, so there’s nothing too special about it. It’s able to withstand all of the normal wear and tear from normal cat usage without breaking. 

Value

As of November 2018, a Breeze System starter kit costs just under $33 on Amazon. The starter kit includes the following:

  • Litter box with scoop
  • 3.5 lb bag of filtering litter 
  • Pack of 4 absorbent pads (1 mo. supply for a single cat household)

You will need to purchase replacement absorbent pads regularly. They are available in bulk, but they’re sort of expensive. Six packs of ten replacement pads will cost you about $75. The pads are available in two scents:  Original and Spring Clean.


The special dehydrating pellets that the Breeze System uses must also be replaced periodically. For a single-cat household, the litter pellets usually last about a month. The litter pellets are also sort of expensive. One replacement bag of litter weights 3.5 lbs., and you can buy a pack of six replacement bags for about $40.


Replacement of the absorbent pads and special dehydrating litter pellets are the biggest downsides of the Breeze System in terms of value. However, there’s no such thing as a free lunch. No matter what type of litter box system you choose for your cat, you are going to have some recurring costs associated with it. The litter pellets last much longer than traditional clumping litter since they do not have to bear the brunt of absorbing all of your cat’s urine. If you’re feeling frugal, you can also go with some non-name brand absorbent pads that Amazon sells directly:


Reviews of the Amazon pads are mostly positive, and they will save you a good amount of money if used in place of the Tidy Cats version.

Pros & Cons

Pros

  • The absorbent pads dramatically reduce the amount of litter consumed whenever your cat goes to the bathroom.
  • Absorbant pads and dehydrating litter absorb odors
  • No more scooping up big chunks of cat pee
  • Sidewall keeps litter pellets inside of the box and off of your floor
  • Great odor control
  • Replacing the absorbent pads is quick and easy
  • Generic absorbent pads are available, saving you some money

Cons

  • Replacement absorbent pads and proprietary dehydrating litter pellets are expensive and need to be purchased regularly
  • A bit on the small side, making the box impractical for large cats
  • Some cats may not bury their poop using the dehydrating pellets
  • Consuming the litter pellets can be harmful to your cat, although this is rare

Final Verdict

The Purina Tidy Cats Breeze Litter Box System earns an 8.0 / 10.0. This is a solid litter box that can save you a bit of consternation associated with scooping clumps of cat urine. The replacement dehydrating pellets and urine-absorbing pads are a little expensive, but the cost of replacing them ends up being fairly close to the cost of replacing clumping litter constantly, especially if you go with the generic replacement pads. This may not be the best litter box for large cats, but it certainly works great for kittens and medium sized cats. Check it out on Amazon!

Modkat Top Entry Litter Box Review

Modkat Top Entry Litter Box Collage of Cats

We all want the best for our cat. That goes for their litter box too, even if it is just a big cat toilet. Of course, we want a litter box that our cat likes, that reduces odor, and that’s easy to clean. But we ideally would also like one that looks good too.

If the aesthetics of your litter box are important to you, then wouldn’t you be interested in a litter box that the New York Times once referred to as, “the iPod of litter boxes?” Keep reading to find out more!

Covered vs. Uncovered Litter Boxes

Although we’ve covered (pun intended) this subject before (see our CatGenie, KittyTwister, or IRIS litter box reviews), it bears repeating: uncovered litter boxes are typically a better option than covered litter boxes. Covered litter boxes keep odor trapped inside, which sucks for your cat. Litter also does not clump as well in a covered box. Plus, covered litter boxes leave cats feeling unsafe since they don’t have a good view of their surroundings while they’re going to the bathroom.

Of course, as we saw in the case of the IRIS litter box, use of a top entry in lieu of a side entry can help curb a lot of the issues associated with a covered litter box. The litter box we’re going to be taking a look at today is in also a top-entry, and it’s a pretty big deal in the litter box world: The Modkat Top Entry Litter Box.

Modkat Top Entry Litter Box

Specifications
  • Materials:  Plastic
  • Box Dimensions:  16” L x 16” W x 16” H
  • Liner Dimensions: 16” L x 16” W x 10” H
  • Entry Size:  9.5” Diameter
  • Weight: 6.5 lbs
  • Color Options:  (See table below)

White
Gray
Black

Description

The Modkat Top Entry Litter Box is offered by Modkat, a niche company that only sells litter boxes and their associated accessories. Modkat also offers three other types of litter box in addition to the Top Entry model. Their entire line also includes the following models:

Modkat Tray
Modkat Flip
Modkat XL

The Modkat Top Entry Litter Box is almost a perfect cube. Your cat enters the box through a generously sized hole on the top of the box. A tarp-like reusable liner sites inside of the litter box, holding the litter and preventing it from coming into direct contact with the litter box.  After your cat does her business, she can exit back out through the hole in the top of the box.

The box contains a perforated plastic roof. Whenever your cat exits, she may walk on the roof of the box. Litter tracking is minimized by the perforated surface, and bits of litter that fall off of your cat’s paws are allowed to fall back into the box through the perforations.

Check out the video below to see the Modkat Top Entry Litter Box in action (don’t worry, not TOO in action. You’ll just see some cats going in and out of the box, plus some people dancing):


Assessment
Design

The Modkat Top Entry Litter Box is constructed of strong, durable plastic, and the base of the box is seamless. This prevents it from leaking in the event that the reusable liner begins to wear out with time. One other benefit of the litter box is that it can be purchased in three different colors: white, black, or gray. Modkat used to carry a bunch of other fun colors, including red, blue, and orange, but they have since eliminated these lines. 

Since your cat can only enter the litter box by climbing on top of it, this box may not be suitable for very young kittens or elderly cats with limited mobility. However, this box works great for the vast majority of cats.

The manufacturer of the Modkat Top Entry Litter Box recommends that the box works best for cats 12 pounds and under. Larger cats may damage the internal liner or simply not have as much space to move around while going to the bathroom. However, the lid can support up to 30 lbs of weight. 

The litter box also comes with a scoop that can be mounted on the side of the box. While the inclusion of a litter scoop is a nice feature, the location of the scoop mount on the side of the box is sort of awkward. You may want to consider storing the scoop somewhere else instead of hooking it to the litter box.

Ease of Use

When it comes to cleaning, the Modkat Top Entry Litter Box has a few advantages over other types of litter boxes. The lid connects directly to the body of the box, but it swivels, providing easy access for scooping. Swiveling the lid causes any litter that is collected on the surface to fall back into the box. Once you finish cleaning the box, the lid locks back into place. 

The simple box shape makes it easy to scoop and prevents collection of cat urine and feces in nooks and crannies. The liner should prevent litter from collecting in the box directly. Be on the lookout in case your cat is scratching at the liner aggressively to bury her waste. The liner is strong, but some users have reported tears caused by aggressive waste burying.

Changing out the entire litter supply is also easier than most boxes. The reusable liner detaches from the box, allowing you to lift it out of the box and pour out used litter into a garbage can. This is much easier than picking up the entire litter box and trying to dump it out. You can also clean the liner during litter change outs using soap and water. Make sure to dry the cleaned liner completely before placing it back into the box.

Make sure to replace the replaceable liner periodically. The liner is typically good for about three months, but the lifespan may vary depending on how many cats use the box. Replacing the liner will help control odor and will ensure that your cat has a fresh space to do her business.

Modkat Top Entry Litter BoxQuality and Durability

The plastic used to construct Modkat Top Entry Litter Box is strong, so you don’t have to worry about the box breaking from normal wear and tear associated with cat usage. The lid is strong enough to hold a couple of cats without falling into the box or breaking. While you shouldn’t use it as a stepping stool, you don’t have to worry about the box breaking on you.

The reusable liner that holds the litter helps extend the lifespan of the plastic box. It also prevents odors from feces and urine from seeping into the plastic and gradually impregnating it with odors over time. Keeping the box liner Although the reusable liner is a bit annoying since you have to replace it approximately once every three months, it also extends the lifespan of the Modkat Top Entry Litter Box significantly.

Value

The Modkat Top Entry Litter Box is one of the more expensive conventional litter boxes on the market. One of the things you’re paying for when purchasing a Modkat litter box is its style and overall aesthetic. Modkat litter boxes tend to look much sleeker and more modern than most litter boxes. There aren’t a lot of options when it comes to cool-looking litter boxes, so the Modkat may be your best bet.

As of November 2018, the Modkat Top Entry Litter Box costs just under $70. It’s a bit more expensive that the IRIS Top Entry Litter Box, but it also looks a little bit cooler. It also comes with a free litter scoop. Even though those are only about $3, it’s nice to get things for free.

Aside from purchasing litter from time to time, you will need to purchase new replacement liners every few months. Replacement liners come in packs of three, and a pack of three costs about $32. That equates to a little over $10 per liner, or $10 every three months.

Pros
  • Decreases litter tracking by forcing your cat to exit by walking over the lid.
  • Top entry prevents litter scatter while your cat is burying her waste
  • Comes with a reusable liner, reducing the chance of leakage or damage to the litter box while making litter change-out easier.
  • Swivel lid allows for easy access for scooping and cleaning, but it won’t swivel while your cat is on top of it
  • Has a unique aesthetic appearance 
  • Box shape makes it easy to fit the litter box into a corner.
Cons
  • Reusable liners must be replaced approximately once every 3 months, or potentially more frequently if you have more than one cat.
  • Liners can be scratched by more aggressive cats and are a pain to clean.
  • Box is undersized for larger cats and oversized for young kittens.
  • Some cats do not like top entry litter boxes.
  • A bit expensive.

Final Verdict

After careful review, the Modkat Top Entry Litter Box earns an 8.4 / 10.0. Is it really, “the iPod of litter boxes,” as the New York Times proclaimed almost ten years ago? That description may be a bit hyperbolic, but the Modkat Top Entry Litter Box is a damn fine litter box. It’s comparable to the IRIS Top Entry Litter Box, which scored a 9.5. The biggest advantage that the IRIS has over the Modkat is its value. However, the Modkat has the edge on the IRIS when it comes to aesthetics and design. Check it out on Amazon!

PetSafe ScoopFree Self-Cleaning Cat Litter Box Review

PetSafe ScoopFree Self-Cleaning Litter Box with a cat exiting the box.

Nobody likes scooping up dirty cat litter or cleaning a litter box out. It’s a gross, messy process, and it never ends.

If you really, reeeeeally hate scooping up your cat’s litter box day after day, you may want to consider getting a self-cleaning litter box. They cost a little more money up front, but the benefits are worth it.

Benefits of a Self-Cleaning Litter Box

We covered several of the benefits of using a self-cleaning litter box in our review of the CatGenie Self-Flushing, Self-Cleaning Litter Box. Here’s a summary of why owning a self-cleaning litter box is great:

  • No more litter scooping
  • Better odor control since waste is removed automatically
  • Easier to clean than a manual / traditional litter box
  • Cleaner environment for your cat
  • Allows you to go on short trips without having to worry about litter box maintenance

PetSafe ScoopFree Self-Cleaning Litter Box

Overview

The PetSafe ScoopFree Self-Cleaning Litter Box uses replaceable, disposable litter trays. Each tray comes pre-filled with blue crystal litter. Crystal litter is made out of porous clumps of sodium silicate sand. The porous nature of the crystal clumps makes them great for moisture and odor absorption.

Crystal litter works just like a normal bentonite clay-based cat litter, clumping your cat’s wastes and aiding in dehydration. One of the advantages of a sodium silicate crystal litter is that it produces less dust than a traditional litter.

Once your cat has used the litter box, the box waits for 20 minutes before an automatically controlled rake is activated, removing clumped litter from the box. Clumps of waste and litter are deposited into a covered compartment located on the disposable tray. A flap covers the tray to suppress odors. Alternatively, you can manually trigger a cleaning if you don’t want to wait the full 20 minutes after your cat has gone. Just push the Manual Rake button on the control panel to activate the rake.

Eventually, you will need to change out the disposable litter tray. The lifespan of the disposable litter tray varies depending on the number of cats using the box. For a single-cat household, you should be able to go for 20-30 days between litter tray replacements.

The litter box contains internal sensors that are used to detect if your cat tries to reenter the box during a cleaning cycle. If the sensors detect that your cat has climbed into the box during cleaning, the rake will automatically stop, and its internal timer will reset.

The manufacturer of the PetSafe ScoopFree Self-Cleaning Litter box recommends that the box be used for cats six months and older.

Specifications

  • Models: Original and Ultra
  • Litter Tray Weight: 6.5 lbs
  • Base Color: White
  • Trim Colors: Purple or Taupe
  • Power Supply: AC Adapter
  • Length of Power Cord: 10 ft.
  • Dimensions: 
    • Litter Box Exterior:  19 1/8 in. W x 27 5/8 in. L x 6 3/8 in. H
    • Cat Potty Area:  14 in. W x 15 1/2 in. L

Original vs. Ultra Model

PetSafe offers two models for their ScoopFree Self-Cleaning Litter Box:

Original

Ultra


The Ultra model has all of the features of the Original, with the following bonus features:

  • Privacy Hood (fortunately this is detachable, meaning that you don’t have to fully enclose the litter area if you don’t want to)
  • Adjustable rake timer, allowing you to set the rake to scoop the litter box 5, 10, or 20 minutes after your cat has finished using it
  • Health Counter (keeps track of how frequently your cat is using the litter box and helps you decide when to change the litter tray)

How Does it Work?

Here’s a video of the PetSafe ScoopFree Self-Cleaning Litter Box in action:


Components

The PetSafe ScoopFree Self-Cleaning Litter Box comes with following pieces:

  • Self-Cleaning Litter Box
  • Original Scent Blue Crystal Litter Bag
  • Privacy Hood
  • Power Adapter
  • Litter Tray With Lid
  • Operating Guide

Operation

The diagram below is from the litter box’s operating guide, and it identifies all of the system’s features, controls, and indicators:

With the ScoopFree Ultra, you have the option of adjusting the rake timer so that it scoops the box 5, 10, or 20 minutes after your cat has finished going to the bathroom. Using a shorter time potentially gives the litter less time to clump, but it will help control odor more quickly than the default rake delay of 20 minutes. Alternatively, both models of the ScoopFree Self-Cleaning Litter Box

Maintenance

You will need to change out the litter tray periodically to control odor. While the crystal litter works great at absorbing moisture and odor, it becomes saturated with time. Saturated crystals may be too small to be picked up by the rake, and as a result will remain in the tray. Changing the tray from time to time allows for removal of saturated crystals.

The recommended length of time between litter tray change-outs varies depending on the number of cats that are using the litter box. The following list outlines when litter tray change-outs are recommended based on the number of cats in the household:

  • 1 Cat:  Every 20-30 days
  • 2 Cats: Every 10-15 days
  • 3 Cats: Every 7-10 days

The disposable litter trays can also be used independent of the PetSafe ScoopFree Self-Cleaning Litter Box, acting as portable litter boxes that can be used while traveling. They are plastic lined, which prevents them from leaking. Once you’re done using them, you can simply discard them.

If you have the Ultra model, you can use the Health Counter to keep track of how many times your cat uses the litter box. This can help you get a better idea of how much litter your cat goes through, and it helps you monitor their digestive health. The Health Counter can be reset by using the Health Counter Reset Button on the control panel.

The Ultra model also gives you the option of setting the automatic rake delay timer. You can keep the default time of 20 minutes, or you can change it to 5 or 10 minutes. Just use the Adjustable Rake Timer Button to cycle through the time options.

Value

As of November 2018, the PetSafe ScoopFree Ultra Self-Cleaning Cat Litter Box is going for just under $130 on Amazon, while the Original model is going for just under $100. A 3-pack of replacement litter trays will run you just under $45.

The PetSafe ScoopFree Self-Cleaning Litter Box is not cheap to purchase or maintain. For a single cat, $45 worth of trays should last you about 60-90 days. If you typically spend more than $45 on litter over a 2-3 month period, then purchasing a PetSafe ScoopFree Self-Cleaning Litter Box may make good financial sense.

Design

The biggest difference visually between the Ultra and Original models is the presence of a privacy hood on the Ultra model. As we mentioned in our CatGenie and KittyTwister review articles, covered litter boxes are typically not recommended. As a result, we tend to prefer the design of the Original over the Ultra model. However, the Health Counter feature provided on the Ultra model is extremely useful. If this is a critical feature for you, you can always go with the Ultra model and leave the privacy hood detached.

Users used to complain of urine leaking from the disposable litter trays. To address this, PetSafe began adding a plastic liner to the trays to help prevent leaking.

PetSafe ScoopFree Self-Cleaning Litter Box with a cat standing next to it.

Ease of Use

The PetSafe ScoopFree Self-Cleaning Litter Box is simple to use once it has been set up. Your main responsibility will be making sure to replace the disposable litter trays regularly to control odor, depending on how frequently your cat uses the box. Changing out the litter trays is easy to do and only takes a couple minutes.

Your cat should have an easy enough time adjusting to the box. Some cats find this process a bit more difficult than others. Try placing the ScoopFree Self-Cleaning Litter Box in the same location as your cat’s old litter box. Make sure to keep the old litter box around for a bit until your cat has transitioned to the new box.

Quality & Durability

The litter box is constructed of durable plastic, and it will not have any trouble handling the typical wear and tear it is likely to receive as a cat toilet. Users typically do not complain of rake failures or mechanical malfunctions. Overall, the PetSafe ScoopFree Self-Cleaning Litter Box is well-constructed and operates as designed.

Common Complaints

The largest complaint from users is the fact that the litter box requires you to use its own brand of blue crystal litter. Many people are not comfortable switching away from the bentonite clay litter they are used to. As a result, users tend to complain about the quality of the blue crystal litter. If you are used to using blue crystal litter, this should not be an issue for you.

Users tend to complain that the litter trays do not last long enough. If you have a cat that uses the litter box frequently, or more than one cats, the amount of litter tray replacements necessary to keep odor under control may start to feel a bit excessive. Make sure to take this into consideration when deciding whether or not this box is for you. Any litter box, self-cleaning or manual, is going to perform better when it’s used by fewer cats.

Recommendations from PetSafe for extending the lifespan of the litter trays include the following:

  • Place the litter box in a location with low humidity, in a room with plenty of ventilation and air movement. Avoid placing the litter box in a humid location such as a bathroom or basement.
  • Stir the litter around if your cat tends to go in the same spot over and over again.
  • Consider adjusting your cat’s diet. Cat’s with diets that contain excess amounts of crude fiber and ash may go to the bathroom more than average, causing the waste trap in the tray to fill quickly. Reducing the amount of crude fiber and ash in your cat’s diet will reduce the amount of solid waste they produce, extending the lifespan of the litter trays.

Pros & Cons

Pros:

  • No scooping required!
  • Capable of fully automatic operation for weeks at a time
  • Disposable litter trays – less cleaning!
  • Waste is stored in a sealed container
  • Crystal litter is designed to limit tracking out of the box
  • Safety sensors stop the box from running while your cat is inside
  • Health Counter tracks the number of times your cat uses the litter box, which can be very useful for keeping an eye on your cat’s digestive health

Cons:

  • Requires repeated purchase of new litter trays
  • Lifespan of litter trays may be reduced if your cat uses the litter box frequently or more than one cat is using the box.
  • Some people simply do not like blue crystal (sodium silicate) litter
  • Some cats may be a little slow to adjust to the new litter box

Final Verdict

The PetSafe ScoopFree Self-Cleaning Litter Box earns a score of 8.2 /10.0 on our rating scale. This box performs a little better than the CatGenie. It’s a bit less clunky, and it’s easier to set up and maintain. The box performs well and will allow you to eliminate litter scooping from your regular chore schedule. Just make sure to change the trays regularly and keep an eye on it, and the ScoopFree Self-Cleaning Litter Box will do the rest. We recommend going with the Original model over the Ultra, since it costs a little less and doesn’t include the unnecessary privacy hood. Check it out on Amazon!

Deep Cat Questions: Why Do Cats Chew on Plastic?

Cat lying on a plastic garbage bag

My cat, Hunter, is pretty much your typical indoor house cat. He likes sleeping and playing with leaves and other stray items. He enjoys the occasional piece of tuna or dollop of yogurt.

But Hunter also has a weird habit. Sometimes, he chews on plastic.

Hunter has chewed on plastic since I adopted him as a kitten in 2005. Normally, I find him doing it whenever he wants to be fed, or when he wants to play. I always assumed it was just his way of trying to get attention. I tried to be careful not to leave wrappers out where he could find them.

But then, as Hunter grew older, he started to develop another weird habit. He started to eat cobwebs.

Cat with cobwebs in his whiskers

When I first noticed that Hunter was eating cobwebs, or spiderwebs, I figured it was just because he found a spider to play with and the cobwebs were getting stuck in his whiskers. But I started to notice him prowling around the corners of my basement occasionally, seemingly seeking out new cobwebs to eat. I also noticed him approaching spiderless cobwebs with increasing frequency.

Eating cobwebs does not seem to cause any problems with Hunter’s digestion. The amount of material they actually contain is tiny since cobwebs are very, very thin.

I did some a little bit of internet research and found several other cat owners who described similar behaviors in their cat. But no one really had a definitive answer as to why their cats seemed to enjoy chewing on plastic or eating cobwebs. However, most veterinarians agree that each of these behaviors can be classified as a form of pica.

What is Pica?

Pica is a condition where an animal is compelled to eat or chew compulsively on non-food items. The term may be applied to a number of different animal species, including humans.

Cats may eat or chew on a range of non-food materials from time to time, including shoelaces, boxes, food wrappers, wool, and plenty of other things. 

To figure out why a cat may chew plastic, we need to look at some of the hypothesized causes of pica in cats.

Scientific Research

In 2016, a research study entitled Characterization of pica and chewing behaviors in privately owned cats: a case-control study was published in the Journal of Feline Medicine and Surgery. This cat evaluated the behaviors of 91 cats with pica and compared them to a group of 35 control cats.

According to the study, cats tended to exhibit pica towards the following items (listed in order of most to least frequently observed):

  • Shoelaces / thread
  • Plastic
  • Fabric
  • Other Items
  • Rubber
  • Paper / Cardboard
  • Wool

The study also found that cats with pica tended to vomit more than cats that did not exhibit pica. Cats with pica were also more likely to engage in self-sucking behaviors.

Performance of the study was motivated by the fact that veterinarians have not definitively pinpointed the cause of pica. However, there are a number of different theories as to why cats may be inclined to chew on or eat non-food items.

Plastic bag caught in a tree branch

Causes of Pica

Premature Weaning

Some veterinarians believe that, if a kitten is weaned too early, he may begin sucking on soft non-food items such as wool, fleece, fur, or hair. This behavior may continue into adulthood and eventually transition over to other items.

Nutritional Deficiency

Cats may try to eat non-food items if their diet is missing a critical nutrient or nutrients. For example, it is well established that cats suffering from anemia may try to eat cat litter.

Some cats may eat grass or other plant matter if their diet is low on fiber. 

Plastic does not contain any nutrients that a cat may crave, so it is unlikely that cats chew on plastic based on a nutritional deficiency, unless the plastic used to contain some kind of food.

Cobwebs are essential thin strands of protein. If your cat is not getting enough protein in his diet, he may begin eating cobwebs to replace the missing nutrient. Protein is an essential nutrient for cats. The amount of nutritional value a cat cat gain from eating a cobweb is minimal. It is possible that the cobwebs simply taste good to some cats, so they seek them out to snack on them.

If your cat eats non-food items as opposed to simply chewing on them, you should take him to the vet to make sure his diet is sufficient and he does not have an underlying medical condition.

Anxiety / Boredom

If your cat is not getting enough attention, he may express his loneliness or anxiety by chewing on non-food items, including plastic.

Cats (especially kittens) are very likely to try and chew on electric cords, shoelaces, and other long, string-like items. This is mostly because these items resemble the tails of small animals. Cats love chasing around small animal tails. That’s why they love playing with string so much.

Cats may chew on plastic or eat cobwebs out of boredom, simply seeking an interesting way to spend their time when things are dull. If you notice your cat chewing on plastic or engaging in other forms of pica, consider playing with him or giving him more attention in lieu of punishing him.

Cat sitting in a window next to a vase of flowers

Underlying Medical Condition

Some medical disorders may cause a cat to exhibit pica. Examples of medical conditions that may trigger the expression of pica include:

If you are worried that your cat may have any of the ailments listed above or may not be well, you should take him to a veterinary professional immediately.

Breed

Siamese cats, Birman cats, and other Oriental breeds are more likely to chew and suck on wool than other cat breeds. This is likely because these breeds are predisposed to early weaning. As a result, these breeds of cats may also be more likely to engage in other forms of pica, gradually moving on from chewing on soft fabrics to other items.

Should I Be Worried?

If your cat is eating or chewing on non-food items, you may be concerned for his well being. Since many cats chew on non-food items such as wool blankets, shoelaces, and plastic from time to time, you may want to consider keeping these items out of reach from your cat. This may be enough to stop your cat’s annoying behavior.

For the most part, occasional chewing on plastic and shoelaces is fairly harmless for your cat. Just be sure not to leave plastic bags that your cat could potentially suffocate in accessible. If the problem appears to be more severe and you are concerned that your cat may be ill, consider taking him to a vet for an evaluation.

Pioneer Pet Raindrop Stainless Steel Drinking Fountain Review

Pioneer Pet Raindrop Stainless Steel Cat Drinking Fountain

Today we’re going to look at another entry into the “non-plastic cat drinking fountain” category: The Pioneer Pet Raindrop Stainless Steel Drinking Fountain!

There are a ton of reasons why you should consider getting your cat a fountain. For a recap of those reasons, check, out our iPettie Tritone Ceramic Pet Drinking Fountain Review.

Fountain Specifications

  • Material: Stainless Steel
  • Filtration:  Charcoal
  • Pump Voltage:  12V
  • Cable Length:  70.8 in.
  • Size Options: 2
Size Option 1:  60 oz. (Model 6023)

  • Capacity:  60 oz.
  • Dimensions:  4.25 in. H x 9.75 in. W x 11.75 in. L
  • Weight:  1.7 lbs (empty weight)
Size Option 2:  96 oz. (Model 6027)

  • Capacity:  96 oz.
  • Dimensions:  4.75 in. H x 10.5 in. W x 12 in. L
  • Weight:  2.7 lbs (empty weight)
Fountain Description

The Pioneer Pet Raindrop Stainless Steel Drinking Fountain was developed by Pioneer Pets. Pioneer Pets is headquartered in Cedarburg, WI, and they produce a number of different cat products, including drinking fountains, toys, feeders, and other cat miscellany. In addition to selling cat products, Pioneer Pet also operates Cats International, a non-profit, educational cat organization.

The fountain is made up of five primary components:

  • Top Bowl
  • Bottom Bowl
  • Pump Housing
  • Pump
  • Charcoal Filter

Both the pump and filter are contained in the pump housing. The bottom bowl acts as a reservoir. The pump sits in the bottom bowl, and the top bowl is placed on top of it. The pump pushes water up from the bottom bowl and allows it to spill over an opening in the top bowl. Water passes down a ramp on the top bowl and returns to the bottom bowl for recirculation.

The fountain, pump, and all other pieces of equipment that come with the fountain have a one-year warranty.

Assessment

Operation

There isn’t much to operation of the Pioneer Pet Raindrop Stainless Steel Drinking Fountain. You can see a copy of the instruction manual that comes with the fountain here.

Once the fountain is up and running, it does not require that much maintenance. It’s important to make sure that you keep the bowl filled. If you let the water level run too low, the pump will start to struggle, making noise and potentially causing damage to the motor.

Pump noise can also be minimized if you clean the pump regularly. Pulling off any hair or other material that has collected inside the pump and on the impeller will extend its life significantly.

The manufacturer recommends cleaning the pump 1 – 3 times per month, depending on how many cats are using the fountain. Cleaning the pump involves the following steps:

  1. Unplug the pump
  2. Snap the cover plate off and remove the stator (the round plastic piece that goes over the impeller).
  3. Remove the impeller (it has three blades, like a propeller)
  4. Rinse the pump pieces and the pump cavity, pulling out any debris
  5. Reassemble and return to service

Unfortunately, the pump used for both the 60 oz and 96 oz. models is a bit undersized. The pump operates quietly at first, but it quickly loses suction as the impeller clogs with hair and debris. Once its capacity is reduced, the pump has to work harder to move the same amount of water. When it does this, it gets louder. It also causes more wear and tear on the pump motor, meaning that you’ll have to replace it sooner. The pump’s lifespan can be extended if you are sure to maintain the recommended cleaning schedule.

Check out this video to see how to perform maintenance on the pump:


Accessories

The manufacturer recommends that you replace the filter every 2-4 weeks. As a result, you may need to purchase replacement filters occasionally.

 >> Pioneer Pet Replacement Charcoal Filters

Over time, the fountain pump will gradually lose effectiveness until eventually it stops working. If this happens within a year after you bought the pump, you should check to see if the manufacturer to see if you can get a free replacement pump since it may still be under warranty. If the pump breaks over a year after you bought the fountain, you are going to need to purchase a replacement pump.

 >> Pioneer Pet Replacement Pump

You can also purchase a cleaning kit to make cleaning the fountain a little easier. The cleaning kit includes a brush with two different size heads, as well as a foam pad for cleaning corners.

>> Pioneer Pet Fountain Cleaning Kit

Design

One of the distinguishing features of the Pioneer Pet Raindrop fountain is its unique shape. The fountain has a unique “raindrop” shape that is not found in other fountains on the market.

The fountain’s shape gives your cat the option of drinking from the moving stream of water flowing down the top bowl ramp or the bottom bowl reservoir. One feature that the Pioneer Pet Raindrop Fountain does not have is a free falling stream of water for your cat to drink from. While a free falling stream of water may be a nice option for your cat, it is not essential.

A drawback of the Pioneer Pet Raindrop Fountain’s unique shape is that it’s only accessible to one cat at a time. Circular fountains that provide 360° access allow for multiple cats (and potentially dogs or other animals) to drink simultaneously. The Pioneer Pet Raindrop fountain is designed to provide water for one cat at a time, which shouldn’t be a problem if you only have one cat.

The Pioneer Pet Raindrop Fountain reviewed here is constructed of stainless steel. You can also find versions of the Pioneer Pet Raindrop fountain constructed of plastic and ceramic materials.

Value

As of October 2018, approximate prices of the Pioneer Pet Raindrop Fountain are as follows:

  • 60 oz.:  $36
  • 96 oz.:  $76

For the time being, the 60 oz. is a better value. However, one of the primary customer suggestions for improvements to this model was an increased capacity. Pioneer Pet responded by producing the 96 oz. model. This model has not been available for as long as the 60 oz. version. As a result, it’s still priced quite a bit higher since it is the newest model.

For a one-cat household, the 60 oz. model should be sufficient. You’ll need to replace the water more frequently, but this will give you an incentive to get in there and clean the pump more frequently too. This will extend the overall lifespan of the pump, saving you money.

If you have more than one cat, it’s probably a good idea to go with the 96 oz. model. Otherwise you’ll be refilling the bowl a lot more frequently.

Most mid-range cat drinking fountains on Amazon cost about $30-50. This puts the 60 oz. Pioneer Pet Raindrop Fountain at a very competitive price point, especially considering that the vast majority of cat drinking fountains available on Amazon are made of plastic.

Cat drinking out of a Pioneer Pet Raindrop Stainless Steel Drinking Fountain

Quality & Durability

Stainless steel is very strong. As a result, the Pioneer Pet Raindrop Fountain is very strong. Having a stainless steel fountain means that you’re less likely to break the fountain if you drop it during cleaning.

The pump is a bit weaker than it should be, resulting in weaker flow than some cats may like. You can extend the lifetime of the pump by cleaning it regularly, adhering to the manufacturer’s recommended cleaning frequency of 1-3 times per month.

The lifespan of the pump and the charcoal filter by filling the fountain with filtered water. You will still end up accumulating cat hair in the pump over time though.
Since the fountain is made of stainless steel, it is much easier to clean off any scale that may form on the fountain body. Scale is very difficult to remove from plastic, but it can be cleaned off of stainless steel fairly easily using white vinegar. Just make sure to avoid using vinegar on the pump, and rinse the bowl very well before returning it to service after cleaning with vinegar.  

The fountain is also dishwasher safe, which makes it easy to clean on a routine basis. You don’t have to worry about the fountain warping or melting in the dishwasher like you may need to with a plastic fountain.

Pros
  • Cats prefer circulating water to stagnant water, encouraging healthy drinking habits
  • Constructed of stainless steel, making it easy to clean and maintain
  • Unique shape and stylish design
  • Dishwasher safe
  • Leak free
  • Easy assembly
  • Multiple size options (60 oz. or 96 oz.)
Cons
  • No free-falling water option for your cat
  • Top piece disconnects too easily
  • Pump is undersized and can become noisy if not properly maintained

Final Verdict

Based on our evaluation, the Pioneer Pet Raindrop Stainless Steel Drinking Fountain earns an 8.9 / 10.0. This is definitely a great stainless steel fountain option that your cat will love. It’s easy to clean and maintain, plus the stainless steel makes it much more durable than a plastic fountain. Plus, you get to choose from two size options:  60 oz. or 96 oz. Check them out on Amazon!

IRIS Top Entry Cat Litter Box Review

IRIS Top Entry Cat Litter Box

Ah, litter boxes. Everyone’s favorite cat accessory.

Picking a litter box that works for your cat is crucial. If your cat likes her litter box, she’s way more likely to use it than than she is to go on your damp towels or in the corner of the basement.

Having a bad litter box can be a nightmare. Difficult cleaning, terrible smells, and general avoidance by your cat can all be caused by a bad litter box.

Whenever you decide what kind of litter box you’re going to go with, it’s important to consider the following factors:

  • Size
  • Durability
  • Shape
  • Automatic vs.  Traditional
  • Covered vs. Uncovered Litter Boxes

Covered vs. Uncovered Litter Boxes

As we’ve discussed in some of our other litter box reviews (CatGenie and KittyTwister), cats typically prefer uncovered litter boxes. Uncovered boxes give your cat the opportunity to look around while she’s using the litter box. This gives her the opportunity to be on the lookout for predators or things that may attack her. While this is more important in the wild than in your laundry room, it’s still important to cats.

Uncovered boxes provide superior ventilation and allow urine clump to dry out better than covered boxes.

That being said, not every entry into the covered litter box market is a total dud. Some of the features that make covered boxes unappealing, including their lack of ventilation and the position of vulnerability it places the cat in while using it, can be remedied by simply shifting from a side entrance to a top entrance.

The litter box we’ll be looking at today is a top-entry covered litter box produced by IRIS products. Behold: The IRIS Top Entry Cat Litter Box!

IRIS Top Entry Cat Litter Box

Specifications
  • Materials:  BPA Free Plastic
  • Exterior Dimensions:  20.47” L x 16.14” W x 14.56” H
  • Interior Dimensions:
    • Widest Point:  20.0” L x 16.0” W x 14.0” H
    • Bottom Narrowest Point:  17.5” L x 13.5” W
  • Opening Diameter: 9.5″
  • Weight:  5 lbs. (without litter)
  • Color Options: (see the table below)

White/Beige
Orange/Brown
Black/Gray
Black/White
Dark Gray/Gray
Dark Gray/White


Description

The IRIS Top Entry Cat Litter Box is produced by IRIS USA Inc. Spun off of a Japanese company, IRIS USA Inc. initially entered the North American market in 1994 by offering plastic storage containers. Over time, they naturally expanded into other plastic products, including litter boxes. Which are, essentially, a form of plastic storage container. They produce a number of other pet products as well, including pet food storage containers, carriers, and other litter box models.

Here’s a promotional video that shows a cat exiting the litter box:


Assessment
IRIS Top Entry Cat Litter Box with a cat sitting on top of it
Design

The IRIS Top Entry Cat Litter Box has an ovular shape. It fits well in a corner of a room, and it has plenty of space for your cat to move around while she is doing her business. Even larger cats will be able to fit through the box opening, which is about 9.5 inches in diameter. 

While covered litter boxes tend to be problematic, the IRIS litter box offers advantages over other covered models. The top entrance provides excellent ventilation. Having a top entrance means the box is only partially covered. As a result, urine clumps better in this box than in side-entrance covered boxes. 

The design of the IRIS litter box also allows for adult cats the opportunity to observe their surroundings while they are going to the bathroom. The box is short enough that an adult cat can see over the edge of the entrance hole, giving her a 360° view of the nearby area.

The exterior bottom of the IRIS litter box has small rubber feet. These feet keep the box from sliding whenever your cat jumps out.

Two sizes are available for the IRIS litter box: medium and large. While a medium litter box may be suitable for a kitten, that kitten is going to grow up into a full-blown adult cat. Your best bet is to stick with the large model. 

One disadvantage of the IRIS litter box is that it may not be a good choice for elderly cats or cats with arthritis. Jumping into the box requires some swiftness, and older cats may not be able to easily enter or exit the box. As a result, they may avoid it altogether, going outside of the box.

Ease of Use

Cleaning the IRIS litter box is pretty comparable to cleaning most uncovered litter boxes. The top of the IRIS litter box detaches, which makes cleaning much easier. The high side walls offer an advantage of containing litter that may drop or scatter while you are scooping.

The IRIS litter box has a rounded shape. This means that you have to use the corner of the flat-edged scoop that comes with the box to dig out any litter clumps that collect along the inside perimeter of the box floor. This cleaning motion is a little awkward.

Given the IRIS litter box’s large size, it ends up holding a lot of litter. This makes the box a bit heavy to maneuver around if you want to dump it out entirely. The high side walls also make it difficult to pour the litter out into a garbage bag.

One huge advantage of the IRIS Top Entry Cat Litter Box is that it dramatically reduces litter scattering. Since the entire litter area is enclosed, any litter your cat kicks up while digging will remain in the box. When your cat exits, he has to walk over the box lid. The lid is grooved and collects any additional litter that may be stuck on your cat’s paws.

The IRIS Top Entry Cat Litter Box will not eliminate all litter tracking, but combined with a litter mat it can significantly reduce the amount of stray litter pieces you find around your house.

Unfortunately, the scoop that is included with the litter box is not great. It may be worth investing in a separate litter scoop if you end up disliking it.

IRIS Top Entry Cat Litter Box

Quality and Durability

Material of construction is important when choosing a litter box. The vast, vast majority of litter boxes are constructed from some form of plastic. Plastic is easy to clean, cheap, and lightweight.

Not all plastic is created equal though. Buying a litter box constructed of cheap, flimsy plastic can end up being a mistake. A poorly constructed box is more likely to break, either during cleaning or after your cat jumps on the side of it a bit too hard.

Fortunately, the IRIS Top Entry Cat Litter Box is constructed of strong, durable plastic. The side walls are flexible, allowing litter to be poured out during cleaning. The lid is strong enough for your cat to walk all over it without fear of collapse.

The bottom of the IRIS litter box is also reinforced to keep it from breaking under the pressure of a couple inches of litter and your cat’s weight.

Value

As of October 2018, the IRIS Top Entry Litter Box costs just under $35. The cost varies a little bit depending on which color you choose. This price is comparable to similar litter boxes offered by Petmate and Nature’s Miracle. It’s also significantly cheaper than similar offerings from Modkat.

Compared to other top entry litter boxes constructed of similar materials, the IRIS litter box delivers a lot of value. It’s durable, cats like it, and it greatly reduces the amount of litter scatter your cat produces. 

Pros
  • Limits scattering of litter due to kicking while your cat is burying her waste.
  • Large entrance hole makes it easy for cats to get in and out.
  • Grooves on lid of box help capture pieces of litter from your cat’s paws while she is exiting, further reducing litter scattering.
  • Convenient scoop hook for scoop storage.
  • Available in multiple colors.
  • Open top provides sufficient ventilation, allowing clumps of cat urine to dry.
  • Top of box is removable for easy cleaning.
Cons
  • Top entrance litter boxes are not great for older cats. Older cats may struggle getting in and out of the top entry. For an older cat, you should choose a litter box with low sides for easy entry.
  • Box shape is a little tall for very young kittens.
  • Circular shape is difficult to scoop. Cleaning this box is not a fun time.
  • Scoop included with litter box is very poor quality.

Final Verdict

Based on our rating system, the IRIS Top Entry Cat Litter Box scores a 9.5 / 10.0. This litter box is compact, which makes it good for small apartments. But it still provides plenty of space for your cat to maneuver around while she’s doing her business. The high walls stop litter from scattering all over the place while your cat buries her waste. Plus the grooved top plate collects any remaining litter that may be stuck to her paws.

Having the opening on the top of the box allows for ample ventilation, and adult cats can see out of it while they’re doing their business. It’s great for young and adult cats. Very small kittens and elderly cats may have a tougher time using it, but the majority of cats will have no problem getting in and out.

Even though we typically don’t recommend covered litter boxes, this one is an exception. Cats enjoy it, and the top entrance helps mitigate a number of the problems associated with covered litter boxes. This covered litter box gets Mr. Catmandu’s stamp of approval. Check it out on Amazon!

Cats and Essential Oils: What You Need to Know

Ultrasonic essential oil diffuser

Essential oil diffusers are starting to turn up everywhere. The essential oil industry has been experiencing significant growth over the past few years, and more people than ever before have essential oil diffusers in their homes.

But are essential oil diffusers safe to use around cats?

What Are Essential Oils?

Essential oils are concentrated solutions of volatile aromatic compounds extracted from plants. These volatile aromatic compounds are the source of the plant’s smell and taste. The word “essential” was used to classify these compounds since they contain the “essence” of a plant’s aroma. Each oil, therefore, captures the essence of the plant it was derived from in a concentrated liquid form.

Essential oils are extracted from plants using a variety of different methods, but the two most common methods are distillation and expression (cold-pressing). Once extracted from a plant, essential oils are used to produce scents in soaps, perfumes, cosmetics, and a variety of other products. They are also a fixture in the world of alternative medicine.

Aromatherapy and Alternative Medicine

Essential oils are marketed for use in aromatherapy. Different oils are said to target specific maladies or to offer certain benefits if they are inhaled as a mist or aerosol. Aromatherapists recommend different types of essential oils for improved respiratory health, control of nausea, relaxation, and a whole host of other reasons. The healing properties of essential oils are widely espoused across the aromatherapy community. 

Whether or not essential oils actually do everything that people say they do is an ongoing subject of debate within the scientific and medical communities. Scattered studies have shown that they aren’t bad, but they may not have enough of an impact to be considered truly effective for treatment of many conditions. The way their production and distribution are regulated in the U.S. makes medical evaluation of their effects difficult. Most people enjoy the aromas they produce when diffused, though, and their use can at least have positive mental effects by creating a pleasant atmosphere and sense of well-being.

Essential oil bottles

Regulation of Essential Oils

Essential oils are usually categorized as a cosmetic, a drug, or both by the Food and Drug Administration (FDA). Essential oils that are categorized as a cosmetic do not require approval by the FDA to be put onto the market. The FDA can step in, however, if they receive credible information that indicates a specific product is not safe or if the product is not labeled correctly. The FDA defines a cosmetic as follows:

  • Articles intended to be rubbed, poured, sprinkled, or sprayed on, introduced into, or otherwise applied to the human body or any part thereof for cleansing, beautifying, promoting attractiveness, or altering the appearance [FD&C Act, Section 321(g)(2)(i)(1)]

Essential oils that are categorized as a drug, or as a combination cosmetic / drug, require FDA approval before being sold to consumers. This approval process involves testing for safety and effectiveness of the substance relative to its purported health effects. A large portion of the classification process depends on what the manufacturer of the essential oil claims it is capable of doing. The FDA definition of a drug is as follows:

  • Articles intended for use in the diagnosis, cure, mitigation, treatment, or prevention of disease in man or other animals [FD&C Act, Section 321(g)(1)(B)]
  • Articles (other than food) intended to affect the structure or any function of the body of man or other animals [FD&C Act, Section 321(g)(1)(C)]

If a product’s labeling includes claims that it cures, mitigates, treats, or prevents a disease, the FDA will consider it a drug. As a result, manufacturer’s of essential oils are very careful about what kinds of claims that include on their packaging.

Essential oil diffuser

Medical Research

Selling an essential oil as a cosmetic rather than as a drug is much easier from a regulatory standpoint, and, as a result, many essential oils are produced as cosmetic products. Production of cosmetic products is not standardized, which makes them very difficult to evaluate scientifically as a therapeutic agent. Solutions produced by different manufacturers may contain different essential oil concentrations or levels of purity since production methods are not consistent across the industry. 

Many essential oils are labeled as “therapeutic grade.” There is no regulatory agency or other body that grants this classification. It is used mostly as marketing jargon, and some company’s may define how they classify “therapeutic grade” on their website.Being labeled as “therapeutic grade” does not necessarily mean an essential oil is poor quality. But it is also not a true indicator that an oil is high quality since it is not a regulated term.

Medical research related to the health effects of essential oils in humans is progressing, but it is still relatively scarce and inconclusive. Even less research information is available related to the health impacts of essential oils on cats and other animals. As a result, our knowledge of the medical effects of certain essential oils on cats has been gained through observation of symptoms and detailed reporting to veterinarians.

Essential Oil Diffusers

Essential oil diffusers come in a variety of shapes and sizes. The most popular types of essential oil diffusers include:

Nebulizing Diffuser

Nebulizing diffusers create a very fine mist of oil droplets and diffuse them into the surrounding space. Some of these diffusers use electricity to generate heat, and this heat is used to aid in the diffusion of the essential oils. Other nebulizing diffusers use pressurized air to nebulize and diffuse essential oils. The model shown below uses pressurized air and includes an adjustable airflow dial. 

Essential oil nebulizing diffuser

Ultrasonic Diffuser

Similar to nebulizing diffusers, ultrasonic diffusers also generate a fine mist of oil droplets for diffusion into the surrounding space. They do this by using ultrasonic vibrations to break the oil droplets apart into even smaller droplets. These diffusers require dilution of essential oils with water, creating a more dilute mist.

Ultrasonic essential oil diffuser

Reed Diffuser

Reed diffusers are made up of rattan sticks immersed in essential oils. The oils are pulled up the pores in the sticks by capillary action, and their aromas are released into the surrounding air.

Essential oil reed diffuser
Candle Diffuser

A candle diffuser uses the heat of a candle to warm an essential oil, releasing its fragrance. 

Essential oil candle diffuser

Are Essential Oils Toxic to Cats?

The question of whether or not essential oils are toxic to cats is complicated. While some oils have no observable impacts on cats, others are associated with frequent reports of negative health issues.

The impact an essential oil will have on a cat depends on the type of oil and the concentration the cat is exposed to. The method of exposure also plays a significant role in determining the symptoms of exposure. 

Cats may be exposed to essential oils in the following ways:

  • Inhalation
  • Direct physical contact
  • Ingestion

Most cats will not willingly ingest essential oils. It is very important that you as an owner avoid putting essential oils on anything that your cat may chew on or eat. You should also avoid feeding essential oils to your cat directly. Even having moderate physical contact with essential oils can cause skin irritation in your cat.

Keep essential oils away from areas your cat frequents to avoid having your cat spill a bottle of oil and walk through it or lie down in it. One common way that cats may ingest essential oils is through cleaning them off of their fur.

Specific Essential Oils that are Toxic to Cats

The following list of essential oils that are known to cause poisoning in cats was put together by the Dr. Kia Benson, DVM, for the Pet Poison Helpline:

  • Citrus Oils (Grapefruit Oil, Lemon Oil, etc.)
  • Birch Oil
  • Cinnamon Oil
  • Peppermint Oil
  • Wintergreen Oil
  • Tea Tree Oil
  • Pine Oil
  • Eucalyptus Oil
  • Pennyroyal Oil
  • Clove Oil
  • Ylang Ylang Oil

You should avoid using any of these essential oils on or around your cat. This includes diffusion or topical administration.

Symptoms of Essential Oil Toxicity in Cats

The following symptoms may indicate that your cat has been exposed to essential oils and is having an adverse reaction:

  • Vomiting
  • Diarrhea
  • Signs of irritation on or around the mouth, including redness
  • Difficulty walking or unsteady gait (ataxia)
  • Muscle tremors
  • Difficulty breathing
  • Coughing or wheezing
  • Drooling
  • Lethargy

The APSCA lists essential oils as one of the 15 most common causes of muscle tremors in cats.

What to Do if You Think Your Cat is Suffering from Essential Oil Toxicity

Contact your local emergency veterinary care provider or the Pet Poison Helpline (800-213-6680) immediately if you think that your cat may be suffering for essential oil toxicity. Seek treatment as soon as possible. The faster you seek treatment, the better your cat’s chances of recovery. Do not try to make your cat throw up if you think he may have ingested essential oils. Let the veterinarian handle the situation. Also, make sure to bring the packaging for any products that you suspect may be causing the adverse reaction in your cat to the vet.

Cat sitting on kitchen chair

A Word on the Essential Oil Industry

While researching this article, I came across a really nice-looking infographic created by an essential oil dealer that identified a couple of the essential oils included on the list of toxic essential oils provided by the Pet Poison Helpline as “great for pets.” I didn’t want to share it here since I didn’t want to create any confusion. These kinds of false claims are rampant across the internet, especially in the world of alternative medicine. The number one offenders are almost always selling essential oils and related products.

There is widespread misinformation regarding the impact of essential oils on cats coming from several members of the essential oil industry. That’s not to say that all members of this industry are guilty parties. However, the problem is ubiquitous.

Essential oil dealers frequent the comments sections of articles just like this one. Many of them claim to have healed their cat or other animals using essential oils. Similarly, articles are posted on the blogs of essential oil dealers that list essential oils that they claim are beneficial to cats. Don’t be misled by these claims. The primary objective within this industry is to sell essential oils, and not to maintain the health and well-being of your beloved pet. Be on the lookout for these false claims and always trust the opinion of veterinary professionals. 

Final Thoughts

It is my personal opinion that use of essential oil diffusers should be avoided around cats. It isn’t worth risking the potential negative health impacts. If you’re going to use essential oils while living with a cat, take precautions to operate your diffuser in a location that the cat rarely frequents. Avoid placing it by the cat’s food, water, litter box, or favorite nap spots.

Remember though: I’m not a veterinarian, or any kind of medical professional for that matter. Be sure to ask your veterinarian for their opinion about cats and essential oils!

Correcting Bad Cat Behaviors: Do’s and Don’ts

Cat sitting with some toilet paper that he just made a big mess with

Cats will be cats.

Unfortunately, this means that cats will occasionally scratch your arm, wake you up at night, unroll your toilet paper, destroy the corner of your couch, swat your glass off a shelf, and exhibit countless other behaviors that are, from a human viewpoint, problematic. When considering the cat in its natural habitat and not in your living room, it can be a little easier to understand why cats do the things they do.

Cats scratch surfaces as a way of marking their territory and sharpening their claws. They don’t just hate your taste in furniture.

Cats like to be up high so it’s easier to survey their territory and hunt. They aren’t trying to purposefully take down your ceiling fan.

Cats in the wild need to kill small animals to survive. Hunting is pretty important to them. As a result, they practice it all the time. They aren’t trying to ruin your socks or make you bleed.

Breaking cats of some of their most instinctual habits can be difficult. Most people resort to using a spray bottle of water or just yelling at their cat and hoping for the best. But neither of those strategies are good options. To help you out, we’ve put together a list of cat behavior Do’s and Don’ts for some common problematic cat behaviors.

Cat sitting on a laptop

Most Importantly…

These first items are the most important ones on the list. Not to say that there isn’t some great advice on this list. But following these first few pieces of advice is paramount.

DO…
  • Take your cat to the vet if the problem behavior they are expressing may indicate a health problem. Examples of these behaviors include:
    • Excessive meowing
    • High levels of aggression
    • Urinating outside of the litter box frequently
    • Loss of appetite
    • Frequent eating of non-food objects
DON’T…
  • Rely on Google searches to diagnose your cat’s ailments. Always take your cat to a licensed veterinarian if you have a concern that something is wrong.
  • Physically abuse your pet as a means of correcting his behavior. This is the worst thing you can do. Never do this.

General Friskiness (Scratching, Knocking Things Over, etc.)

DO…
  • Make sure your cat has plenty of interesting toys to play with. Otherwise, your cat may start creating “toys” out of your possessions and batting them around the house. Giving your cat plenty of acceptable play options will make it less likely that they will play fight with your shoes or repeatedly knock your glasses off of your nightstand.
  • Provide plenty of acceptable alternatives to unwanted cat behaviors. For example, if your cat is scratching one of your door jambs, make sure your cat has a good vertical scratching post available. Sprinkle it with some catnip to try and entice your cat into finding a new place to scratch. If your cat continues scratching the door jamb, trying moving the scratching post directly in front of the area that is being scratched. If you still catch your cat scratching at the door jamb again, pick up her front paws mid-scratch and move them gently onto the scratching post.
  • Try to get your cat to associate their problematic behaviors with unpleasant sensations that are completely detached from you, the owner. You don’t want your cat to think that an unpleasant condition only occurs when they exhibit the bad behavior around you. You want them to associate the unpleasant condition with the behavior. Examples of ways to create unpleasant conditions include the use of scents and tastes that cats despise as a means of deterring them from specific behaviors. We’ll discuss how to do this effectively further down in the list!

Cat dancing and being frisky

DON’T…
  • Tempt fate by leaving your house full of clutter that your cat may try to play with. If you leave small objects like paper clips, rubber bands, bottlecaps, and food wrappers around your house, your cat may easily confuse these small items with toys and treat them accordingly. Cats seem to have an extra sense that helps them instantly identify tiny objects that they can bat all around your house. Small objects like these pose a choking risk to cats, and you should prevent your cat from playing with them whenever possible.
  • Encourage bad behavior. If you laugh and pet your kitten after she unrolls an entire roll of toilet paper across your bathroom, she’s probably going to do it again. Don’t provide any sort of physical or psychological reward that your cat may link to her bad behavior. This can be especially difficult when very young kittens begin to nibble on our hands and feet. It’s super cute when this happens, and we tend to reward the kitten with pets and cuddles whenever they do this. Encouraging the behavior in this manner will lead to an adult cat that plays with your hands and feet in the same way, but now with adult-sized teeth and claws. Instead, don’t encourage your kitten when she nibbles at you playfully. You don’t have to discipline her or punish the behavior, but instead put your kitten down and withdraw attention for a couple minutes or so.
  • Yell at your cat to try and correct their behavior. Your cat will not understand. Unless you are yelling at the cat as the bad behavior is being performed, your cat will likely not make the connection between the behavior and the “punishment.” Also, to reiterate, your cat will not understand. He may recognize that you’re heart rate goes up when you are angry and you start making louder, more aggressive noises. But he may confuse it for play. At its best, yelling at your cat will just confuse him. To reiterate a third and final time, your cat will not understand.
  • Use a spray bottle or squirt gun filled with water to try and correct your cat’s behavior. Unless the cat is being sprayed as it is in the middle of performing the bad behavior, she will not link the behavior and the punishment, causing confusion. Also, she will associate the punishing spray of water directly with you, decreasing her trust in you and instilling fear. Your cat will identify the fact that she will only get sprayed if you are around while she is performing the behavior, and she will learn to do it when you are not around. Additionally, there is a good amount of evidence that shows that negative reinforcement (i.e. punishment) is an ineffective training tool, not only for cats but also for people. Animals in general respond much better to positive reinforcement than negative.

Kitten climbing on cat tree

Litter Training

DO
  • Make sure to check with your vet if your cat is frequently going to the bathroom outside of the litter box. There are several medical conditions that can lead to a cat exhibiting this behavior.
  • Have a spare litter box handy. Cats are reluctant to use a litter box that another cat has recently used. To prevent accidents, make sure your cat always has a fresh litter box available. This typically means having at least one more litter box than the number of cats in your household.  
  • See if there’s a specific spot your cat likes to go to the bathroom. If so, try moving his litter box that exact location.
  • Make sure the box is the right size for your cat. A kitten needs a box that is small and easy for them to climb into, while a larger adult cat may need a larger than average litter box to avoid going over the edge by accident.

Cat lying in a litter box

Photo courtesy of Laura LaRose.

DON’T 
  • Get lazy when it comes to scooping your cat’s litter box. Cats hate when their litter box is full. They’re more likely to go off and do their business outside of the box if their litter box is not well maintained. In fact, some cats won’t go in a litter box if there is any waste present at all. Keeping the litter box clean by scooping frequently will ensure that your cats always have a pleasant place to poop.
  • Rely on soap and water when cleaning up cat urine following an accident. Cleaning up cat urine with soap and water may mask the odor of the urine enough for you to find acceptable, but your cat cat smell a lot better than you can. The odor will linger, and since cats like to revisit the same locations when going to the bathroom, you are likely going to have repeat accidents. Instead, use a cleaning product that has been specifically designed for removal of pet odors to neutralize cat urine stains. Make sure to act quickly after observing an accident to prevent any repetition of the behavior. If repeated cleaning is unsuccessful, you may need restrict your cat’s access to the area where accidents keep happening to prevent them in the future. Check out this article for more information about cleaning up cat urine stains.
  • Use a covered litter box. Covered litter boxes are appealing since they (ideally) trap odor, preventing it from spreading around your house. In reality, adding a cover to a litter box introduces a series of other issues. Litter in covered boxes does not dry as quickly as it does in an uncovered box. As a result, it may not clump properly. Your cat will likely find the odor inside the box to be distasteful since covered boxes are typically not ventilated very well. Also, the space provided by a covered litter box puts a cat in a very vulnerable position. Cats like an open litter box since they can see in all directions. In nature, cats are very aware of their vulnerability while going to the bathroom and prefer a location where they can keep an eye on things. Going inside of a box with only one entrance and exit may make your cat nervous, leading to a failure to bury its waste or avoidance of the box altogether.

Cat sitting and looking into a spherical robotic automatic litter box

Photo courtesy of Your Best Digs

Restricting Access:  Keeping Cats Away From Places and Things

DO…
  • Use odors that cats hate to keep them out of certain areas. There are several sprays you can buy that can be applied to furniture and other objects as cat repellants, but these may contain harsh artificial chemicals. There are a number of natural alternatives you may already have around the house that may be worth a try. Here’s a list of smells that cats can’t stand:
    • Citrus – citrus is actually poisonous to cats, but they would need to eat a lot of it in order to have any negative effects. And this is no problem for most cats, since they really hate the smell of citrus.
    • Spicy smells, such as mustard, cloves, cayenne pepper, etc.
    • Eucalyptus oil
    • Wintergreen oil
    • Citronella
  • Take advantage of objects that cats don’t like the feel of, such as aluminum foil, plastic, or sticky surfaces. Placing these materials on or around areas you would like to keep cat-free will discourage your cat from walking there. Cats hate walking on these kinds of materials and will avoid them at all costs.

Cat sitting on a shelf

DON’T…
  • Use mothballs as a cat repellant. Mothballs are highly toxic to cats. They are used for pest control since they act as a pesticide. As a result, you should keep them far away from your cat.
  • Use aloe gel as a way of repelling your cat from places you want them to stay away from. Aloe is poisonous to cats and can cause serious medical problems if even a small amount is ingested. Aloe is one of over 400 plants that are toxic to cats. You can find a complete list of those plants from the ASPCA here.

Cat sitting half in a window, half inside, half outside

The Definitive Guide to Getting Rid of Cat Urine Odors

Blue spray bottle spraying cleaning solution

Every cat owner dreads the smell of cat pee outside of the litter box. When a cat urinates in a litter box, the litter and any odor-absorbing chemicals in the litter help neutralize the smell. Plus, your cat will bury his waste after he’s done going, masking the odor even more. But when a cat goes outside of the litter box and onto something soft and absorbent, the resulting smell can be overpowering.

Why Does Cat Urine Smell So Bad?

Cat urine smells terrible, but in a very specific way. It produces a pungent ammonia odor that worsens as it ages if it is not cleaned up or removed. But why does cat urine smell so much worse than other types of urine?

Diet & Metabolism

Cats eat a lot of protein. In fact, the Association of American Feed Control Officials (AAFCO) recommends that food for adult cats contain at least 26% protein, and that food for kittens contain at least 30%. Some veterinarians recommend even higher protein intake.

The feline digestive system breaks down proteins into a compound called urea. When bacteria break urea down even further, one of the substances that is released is ammonia, the signature aroma of cat urine. As cat urine sits and ages, bacteria break down its constituent compounds even further, releasing mercaptans. Mercaptans are the same compounds that are found in the spray from a skunk. The resulting odor is very, very bad.

Brown tabby cat eating out of a bowl
Hormones

But cat urine doesn’t just contain urea. It also may include hormones. Each cat produces his own unique hormone “cocktail,” and cats use these hormones as a way of marking their territory and signaling to potential mates. The presence of hormones adds an additional (terrible) characteristic to the overall aroma of cat urine,.

Cat urine smells are extremely difficult to remove from fabrics, especially those scents produced by hormones. The scents may be present at  low enough levels that we can’t smell them anymore. But our cat sure can.

When a cat marks a space by urinating on it, he is likely to return to that spot to mark it again in the future. As long as he can still smell the traces of the unique hormone blend that was present in his urine, he will keep returning and attempting to make the smell of his hormones even stronger.

Concentration

Cat urine is highly concentrated compared to human urine or the urine of other species of animals. Having developed in regions with arid climates, cats drink low amounts of water relative to their body size when compared to other mammals. Their bodies are designed to use the water they drink as efficiently as possible. The upside to this is that cats produce a much lower volume of urine relative to their size than other animals, including dogs and humans. The downside to this is that even a small volume of cat urine packs a powerful wallop of smells since it is highly concentrated.

Identifying Cat Urine Stains

Cat urine stains are identifiable by their odor, yellow discoloration, and dampness. If you look at a space and think to yourself, “hey, it looks/smells like a cat peed there,” then he probably did. However, the precise location of a cat urine stain may be difficult to identify if the urine has already dried or if the color of the surface effectively masks any potential discoloration.

One way to locate a cat urine stain that cannot be seen with the naked eye is to use a blacklight or UV light. Cat urine stains will glow white under these types of lights, as will several other types of stains. This may be the only way to identify a stain that has dried or is on a surface that may mask the stain’s appearance.

Cat urine stain on carpet

Getting Rid of Cat Urine Odors

Getting rid of the combination of concentrated ammonia and hormones present in cat urine is challenging. Most normal cleaning products are not powerful enough to fully remove the cat urine odor. After cleaning, your cat, who has a much better smell that you, will still be able to smell his hormones if the site has not been cleaned thoroughly enough or with the right materials. And you’d better believe he’s going to mark it again if he can still smell himself.

You should avoid using any cleaning products that contain ammonia when trying to clean up cat urine. Since the urea in the urine has broken down into ammonia, using an ammonia-based cleaning product is not going to solve your ammonia problem. It will make things worse.

Also, avoid using cleaning products that contain bleach. When bleach and ammonia mix, they release chloramine gas. Chloramine gas is toxic. You should immediately vacate an area where these two chemicals have been mixed and ventilate it to allow the gas to dissipate.

Homemade Cleaning Solutions
White Vinegar & Water

Vinegar is weakly acidic. When it is combined with cat urine, it reacts with the basic salts contained in dried cat urine, neutralizing them.  

Create a solution of white vinegar and water, using one part vinegar for every one part water (50/50 solution). This solution can be rubbed into the cat urine stain using a scrub brush or cloth. Vinegar naturally reacts with ammonia, and using a vinegar cleaning solution will help  to neutralize the painful ammonia smell associated with cat urine. 

The smell of vinegar may remain at the location or on the fabric temporarily after cleaning. It will fade shortly, and the cat urine odor should also be gone by the time the vinegar smell has disappeared.

Apple Cider Vinegar & Water

If the smell of white vinegar is a bit too much for you, you can substitute apple cider vinegar instead.

Apple cider vinegar and white vinegar are produced using the same process and work almost identically to one another as a cleaning agent. Apple cider vinegar tends to be a bit more expensive since it is often sold for consumption in addition to its use as a cleaning agent.

Adding apple cider vinegar to your laundry can help neutralize cat urine odors and remove stains from clothing without add too much of an astringent vinegar smell.

Club Soda and Baking Soda

Using a combination of club soda and baking soda may also help remove cat urine odors.

At least, according to the folks at Arm & Hammer.

Try scrubbing stained carpets and other linens with club soda and allowing it to dry. Then, dust the stain with baking soda and lightly scrub it into the area. Allow the baking soda to react with any of the remaining odors, then vacuum it up.

Baking Soda and Hydrogen Peroxide + Dish Soap

After cleaning a stain with vinegar but before it has fully dried, sprinkle baking soda across the stain. Combine ¼ cup of hydrogen peroxide with 1 tsp. of liquid dish soap and apply to the stain. Scrub the mixture into the stained area, then blot dry.

Make sure you test this stain remedy on a small portion of the carpet before applying it across the entire stain. This will help you make sure that the mixture is not going to cause any discoloration.

Commercial Cleaning Aids

There are a number of enzymatic cleaners on the market that can be used to break down the proteins and other molecules contained in cat urine. Enzymatic cleaners can cause staining or discoloration on some fabrics, so always test the cleaner in a small area before applying it across the entire stain. 

Here are some of the most popular enzymatic cleaners on the market:

Material-Specific Cleaning Instructions

Carpet

Try to blot up as much of the urine as possible if the stain is still wet. Use a clean cloth and cold water. Do not rub the urine into the carpet, but instead use a blotting motion. Avoid applying heat to the stain.

Next, apply your cleaning solution of choice to the stain. Work the solution into the stain with a scrub brush. The solution should not just sit on top of the carpet. You need to make sure that it is pushed deep into the carpet so it can contact as much cat urine as possible.

Let your cleaning solution soak into the stain for at least 10 minutes. Scrub the stain using a scrub brush, then blot the stain dry using a clean cloth. Try to remove as much cleaning solution as possible through absorption. This will allow the cleaned stain to dry faster.

Avoid using bleach or other harsh cleansers that may discolor the affected area.

Make sure you remember to vacuum the stain area after it has dried. This will remove any remaining dry particles of cat urine or cleaning solution that may still be in the carpet.

You may need to repeat this process a few times to fully remove the cat urine smell. In the event that the urine soaked all the way through your carpet and into the materials below, you may have a difficult time ever getting the space clean. Consider putting something on top of the spot if convenient, like a piece of furniture, to keep your cat away from it.

Black cat lying on a brown carpet

Clothing, Towels, and Linens (Machine Washable)

Rinse the stained area with cold water. Place the stained items in the washing machine and add your normal laundry detergent. Next, add 1 cup of baking soda and ¼ cup of vinegar (apple cider or white) to the washing machine. Run the machine. You may need to repeat the process a few times to fully remove the odor. If baking soda and vinegar aren’t cutting it, consider trying an enzymatic cleaner.

Do not put your clothes in the dryer after you’ve cleaned the stains out of them. The heat from the dryer can permanently trap any remaining odor in the fabric. Allow your clothes to air dry, then check to see if you can still smell the cat urine. Repeat as necessary.

Couches, Chairs, Pillows, Mattresses, etc.

Just like cleaning a carpet, blot up as much of the liquid as you using a clean cloth. Using a cloth dampened with cold water, wet the stained area. Then repeat the blotting process.

Next, apply your cleaning solution across the entire stain. Gently scrub the cleaning solution into the stain using a soft scrub brush. Allow the solution to soak into the stain for at least 10 minutes.

After allowing the stain to soak, use a scrub brush to scrub the stain. Then, blot up the remaining cleaning solution using a clean cloth. Once the area has been dried, you will need to keep the area covered with a cloth until the cleaning process has been repeated enough times to permanently remove the cat urine odor. Make sure to replace the towels regularly, and repeat the cleaning process as many times as needed to get rid of the smell.

Hard Surfaces

Hard surfaces may be cleaned using stronger cleaning products than carpets, upholstery, mattresses, or clothing. Make sure the cleaning solution you use does not contain ammonia or bleach.

Depending on the type of surface, you may not be able to use an acidic cleaner. Fortunately, cat urine smells are easier to remove from hard surfaces than from fabrics. Make sure to clean the spot several time until the odor is no longer detectable.

Cleaner being sprayed onto a wood surface by gloved hands holding a sponge.

Tips for Avoiding Future Accidents

  • Keep the litter box clean
  • If your cat urinates somewhere, you may need to repeat the cleaning procedures above several times before your cat loses interest in urinating there again.
  • Place your cat’s food near the location where he previously urinated. Cats are less likely to go to the bathroom in the same place that they eat.

If your cat continues having accidents outside of the litter box, bring him to your vet immediately for an evaluation. Several medical conditions may cause an adult cat to stop using his litter box. For example, when older cats develop arthritis, they may avoid the litter box because it is painful to enter and exit. The sooner you get your cat checked out, the sooner the problem can be diagnosed accurately.